How To Plant Bulbs In Pots
Want to add a splash of color to your patio or balcony? Whether you’re dreaming of cheerful tulips or fragrant hyacinths, container gardening is the perfect solution for small spaces. Let’s get your hands dirty and those bulbs in the ground quickly.
How Do You Plant Bulbs in Pots for Best Results?
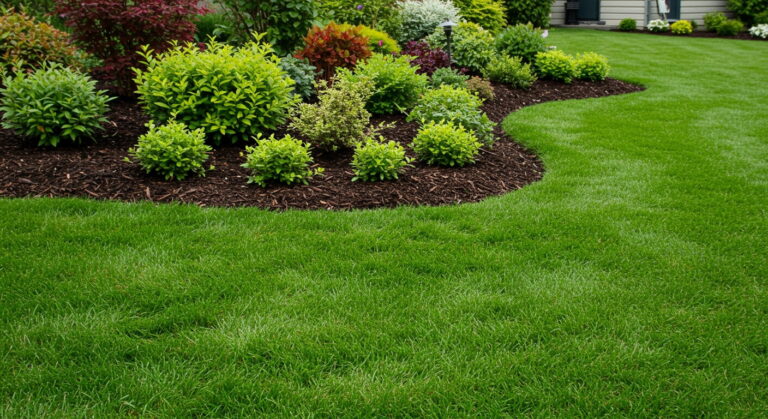
Selecting the Right Container for Your Bulbs
Choosing the perfect pot is the first step toward a vibrant display, so don’t rush this part. You want a container that is deep enough to accommodate the bulbs’ root systems, usually at least 12 inches deep for larger varieties like tulips or daffodils.
Width matters too because you can pack bulbs in tightly for a lush look, but ensure there is room for drainage holes at the bottom. Soggy soil leads to rot, so proper drainage is non-negotiable.
Materials like terracotta or breathable plastic work well, but make sure the pot is heavy enough to stay upright in windy weather. If you are using thin plastic, place it inside a heavier decorative cachepot for stability.
Choosing the Best Soil Mix and Drainage
Your bulbs need a healthy start, so skip the heavy garden soil and opt for a high-quality potting mix designed for containers. This mix is light, fluffy, and allows excess water to escape easily, preventing your bulbs from sitting in moisture and rotting.
You can improve drainage further by mixing in some perlite or coarse sand, which keeps the soil structure open. Before adding soil, place a few shards of broken pottery or gravel over the drainage holes to stop the mix from washing out.
This simple step keeps everything tidy while ensuring water flows freely. Fill the pot about halfway, then add a slow-release fertilizer to give your plants the nutrients they need for strong blooms.
Preparing Bulbs Before Planting
Healthy bulbs are essential for a successful show, so take a moment to inspect them before they go into the dirt. Look for firm specimens and discard any that feel soft, mushy, or show signs of mold, as these won’t thrive.
While you don’t need to peel off the papery skin, gently brushing off loose dirt is fine. Some gardeners suggest a quick soak in water for a few hours to hydrate them, but usually, planting them dry is perfectly fine.
Arrange them with the pointed tip facing upward, as this is where the stem will emerge. Spacing doesn’t need to be strict in pots, so you can place them close together, almost touching, for a dramatic impact.
Step-by-Step Guide to Planting Bulbs in Containers
Layering Bulbs for a Continuous Bloom Display
Layering bulbs, often called the ‘lasagne method,’ is a brilliant way to maximize your container space and enjoy weeks of color. Start by adding a few inches of potting mix to the bottom of your pot.
Place your largest bulbs, like tulips or daffodils, directly on the soil, ensuring they aren’t touching each other. Cover these with a layer of soil, then add medium-sized bulbs like hyacinths. Add another soil layer before planting smaller bulbs such as crocuses or grape hyacinths at the top.
Staggered planting depths ensure that different varieties bloom at different times, creating a spectacular and long-lasting display that keeps your pots vibrant throughout the season.
Setting the Correct Planting Depth
Getting the depth right is crucial for healthy growth, but it doesn’t have to be complicated. A general rule of thumb is to plant bulbs at a depth roughly two to three times their height.
For example, a large bulb that is two inches tall should be planted about four to six inches deep. Measure from the base of the bulb to the soil surface, not the tip.
If you are unsure, err on the side of planting slightly deeper rather than too shallow, as this offers better protection from cold snaps and hungry critters looking for a snack.
Watering and Initial Care After Planting
Once your bulbs are nestled in their soil, give them a thorough watering to help settle the soil and eliminate large air pockets. Consistent moisture is key during the autumn and winter roots are developing, so ensure the soil never dries out completely.
However, be careful not to overwater, as bulbs sitting in soggy soil are prone to rot. Move your pots to a cool, sheltered spot or a garage to protect the developing roots from extreme freeze-thaw cycles.
Once shoots appear in late winter or early spring, you can move them into the sunlight to encourage blooming.
Which Bulbs Grow Best in Pots?
Top Spring Bulbs for Containers Like Tulips and Daffodils
Spring bulbs like tulips and daffodils are perfect for pots because they thrive in well-drained soil and add a burst of color after winter. To plant them, choose a container with drainage holes and fill it with potting mix mixed with compost for nutrients.
Place the bulbs pointy side up, about twice as deep as their height, and space them a few inches apart. For a fuller display, layer smaller bulbs like crocuses above larger ones—this technique, called lasagna planting, ensures weeks of continuous blooms.
Water thoroughly after planting and place the pot in a cool, sunny spot. In colder climates, protect pots from freezing by moving them to a garage or wrapping them in burlap. With minimal care, you’ll enjoy a vibrant spring display that brightens up any patio or balcony.
Summer and Autumn Flowering Bulbs for Pots
Summer and autumn bulbs like lilies, dahlias, and gladiolus thrive in pots, offering extended color through the warmer months. Plant these bulbs in spring after the last frost, using a drainage-rich soil mix to prevent rot.
Place larger bulbs at the bottom of the pot, covering them with soil, and add smaller varieties like begonias near the surface for depth. These bulbs love sun, so position your pot where it gets at least six hours of light daily.
Water regularly but avoid waterlogging—let the top inch of soil dry out between waterings. For autumn bloomers like colchicums, plant in late summer for a surprise burst of late-season color.
Pots can be moved indoors or to a sheltered spot during harsh weather, making these bulbs a flexible, low-maintenance choice for year-round beauty.
Combining Different Bulb Varieties in One Pot
Mixing bulb varieties in one pot creates a stunning, multi-season display with minimal effort. Start by selecting bulbs that bloom at different times, such as early daffodils, mid-season tulips, and late-blooming alliums.
Layer them in the pot, placing the largest bulbs at the bottom and smaller ones on top—this ensures each has enough room to grow. Use a layered planting method: cover larger bulbs with soil, then add the next layer, finishing with a top planting of shallow bulbs like grape hyacinths.
This approach maximizes space and provides weeks of continuous color. Pair bulbs with complementary colors or contrasting heights for visual interest. Don’t forget to water well after planting and keep the soil moist but not soggy.
With this technique, a single pot can deliver a vibrant, ever-changing floral show from spring to early summer.
When Should You Plant Bulbs in Pots?
Ideal Planting Times for Spring Blooms
For vibrant spring blooms like tulips, daffodils, and hyacinths, plant your bulbs in pots during the fall months, ideally 6-8 weeks before the ground freezes. This gives them time to establish roots before winter.
Choose a pot with drainage holes, fill it with well-draining soil, and place bulbs pointy side up, spaced about 2-3 inches apart. Water lightly after planting to settle the soil, then move the pot to a cool, dark spot (like a garage) for 12-16 weeks of chilling.
This mimics winter and ensures they bloom beautifully in spring. Once shoots appear, move the pot to a sunny spot and enjoy!
Planting Schedules for Summer and Fall Varieties
Summer and fall bloomers like lilies, dahlias, and gladiolus thrive when planted in pots after the last frost date in spring. These bulbs prefer warmer soil, so wait until temperatures are consistently above 50°F. Use a large pot with good drainage and fill it with nutrient-rich compost.
Plant bulbs at a depth of 2-3 times their height, spacing them 4-6 inches apart. Water regularly but avoid waterlogging, as this can cause rot. For a longer display, stagger planting every two weeks. Place pots in a sunny location and watch them flourish with colorful blooms all season.
Forcing Bulbs for Winter Indoor Color
To brighten up winter days, try forcing bulbs like paperwhites or amaryllis indoors. Start by selecting a shallow pot and filling it with gravel or soil for drainage. Place bulbs close together, with their tips just above the surface. Water sparingly at first, then increase as growth begins.
Keep the pot in a cool, bright spot (around 60-65°F) to encourage sturdy stems. Within 4-6 weeks, you’ll have fragrant, cheerful blooms. For continuous color, plant new pots every few weeks. Just remember to rotate the pot occasionally so stems grow straight.
It’s an easy way to bring life to your home during winter!
Caring for Potted Bulbs Through the Seasons
Sunlight and Temperature Requirements
When growing bulbs in pots, sunlight is key to their success. Most bulbs, like tulips and daffodils, thrive in full sun, requiring at least 6 hours of direct light daily. Place your pots in a sunny spot, such as a south-facing patio or balcony.
However, in hotter climates, afternoon shade can prevent scorching. Temperature matters too—bulbs need a period of cold dormancy to bloom. If you’re in a mild climate, chill potted bulbs in a fridge for 12-16 weeks before planting. During growth, keep pots away from extreme heat or freezing drafts.
For indoor bulbs, like amaryllis, a warm, bright spot encourages blooming. Adjust placement seasonally to ensure bulbs get the light and warmth they need without overheating or freezing.
Watering and Feeding Schedule
Proper watering is crucial for potted bulbs. After planting, water thoroughly to settle the soil, then keep it evenly moist but not soggy—bulbs can rot in standing water. During active growth, check soil daily; pots dry out faster than garden beds.
Reduce watering after blooms fade to let foliage die back naturally. Feed your bulbs with a balanced, slow-release fertilizer when shoots first appear. For long-lasting blooms, switch to a high-potassium feed (like tomato fertilizer) every 2-3 weeks. Avoid overfeeding, as excess nutrients can cause weak stems.
If storing dormant bulbs, stop watering entirely until replanting. Remember, consistent moisture and light feeding will reward you with vibrant flowers year after year.
Deadheading and Foliage Maintenance
Once blooms fade, deadhead promptly to redirect energy into the bulb, not seed production. Snip off spent flowers just below the flower head, but leave the stem intact. This keeps the plant tidy while allowing foliage to photosynthesize.
Never cut back green leaves prematurely—they’re replenishing the bulb for next year’s blooms. Let leaves yellow and wither naturally, which can take 6-8 weeks. If the foliage looks messy, gently tie it back or interplant with annuals to hide it.
For indoor bulbs, remove leaves only after they turn fully brown. Regular deadheading and patience with foliage ensure your bulbs stay healthy and ready to dazzle again next season. With minimal care, potted bulbs can provide beauty for years to come.
Overwintering and Protecting Potted Bulbs
How to Insulate Pots During Freezing Temperatures
When winter arrives, your potted bulbs need extra care because their roots are more exposed to the cold than those in the ground. Start by grouping your pots together against a wall or in a sheltered corner to create a shared warmth zone.
Wrap the pots with burlap, bubble wrap, or old blankets to add a layer of insulation. For extra protection, place the wrapped pots inside a larger container and fill the gap with straw or leaves—this creates a protective barrier against freezing.
If you have space, moving pots into an unheated garage or shed is ideal, but ensure they still get some light. Avoid placing them near heat sources, as bulbs need a period of cold to bloom properly.
By taking these steps, you’ll prevent frost damage and keep your bulbs safe until spring.
Storing Dormant Bulbs for Next Season
If you live in a harsh climate, you might prefer to dig up and store tender bulbs like dahlias or gladiolus over winter. After the foliage yellows and dies back, gently remove the bulbs from the soil and shake off excess dirt.
Let them dry in a cool, shaded spot for a few days to prevent mold. Once dry, place them in a ventilated container like a cardboard box or mesh bag filled with peat moss, sawdust, or perlite.
Store the box in a dark, cool place (around 40-50°F), checking occasionally for rot or drying out. Label the container to remember which bulbs are which. This method ensures your bulbs stay healthy and ready to replant when the ground warms up next year.
Reviving Potted Bulbs After Winter
As winter fades, it’s time to wake your potted bulbs from dormancy. Move the pots to a sunny spot and water them lightly to moisten the soil.
If the bulbs were stored indoors, gradually reintroduce them to outdoor conditions to avoid shock—start with a shaded area before moving to full sun. Watch for green shoots poking through the soil, which signals they’re ready for regular watering and a balanced fertilizer to support growth.
If you overwintered tender bulbs indoors, you can replant them now, ensuring they’re placed at the right depth. With a little care, your bulbs will reward you with vibrant blooms, bringing color and life back to your garden after the cold months.
Troubleshooting Common Issues with Bulbs in Pots
Why Are My Bulbs Not Sprouting?
If your bulbs seem to be taking a nap, don’t panic just yet. The most common reason bulbs fail to sprout is improper planting depth. If they are buried too deep, they might struggle to reach the surface, while planting them too shallow exposes them to temperature fluctuations.
Generally, you should plant bulbs at a depth two to three times their height. Another culprit could be poor drainage; bulbs sitting in waterlogged soil will rot before they have a chance to grow. Ensure your pots have drainage holes and use a loose, well-draining potting mix.
Finally, check the quality of the bulbs before planting—discard any that feel soft or look moldy. Patience is also key, as some varieties take longer than others to wake up.
Preventing Mold and Rot in Container Bulbs
Mold and rot are the enemies of healthy bulbs, but they are easy to prevent with a little care. The most important step is ensuring your container has adequate drainage holes to allow excess water to escape. Without this, moisture accumulates, creating a breeding ground for fungus and rot.
Use a high-quality, well-draining potting soil mix rather than heavy garden soil. When watering, aim to keep the soil moist but not soggy, especially during dormant periods. Overwatering is a frequent mistake, so let the top inch of soil dry out between waterings.
If you spot mold on the soil surface, gently scrape it off and improve airflow around the pot. Also, avoid overcrowding bulbs, as poor air circulation can encourage fungal growth.
Dealing with Pests That Target Potted Bulbs
Pests like squirrels, chipmunks, and insects can wreak havoc on potted bulbs, but there are simple ways to deter them. For critters digging up your bulbs, try covering the soil with hardware cloth or chicken wire just below the surface.
This physical barrier prevents animals from reaching the bulbs while allowing shoots to grow through. You can also sprinkle cayenne pepper or crushed eggshells around the pot to discourage digging. For insect pests like aphids or bulb mites, inspect your bulbs regularly and remove any that show signs of damage.
Neem oil or insecticidal soap can help manage infestations without harming your plants. Keeping the area clean and free of debris also reduces hiding spots for pests, ensuring your bulbs stay safe and healthy.
Frequently Asked Questions
When is the best time to plant bulbs in pots?
Spring-flowering bulbs like tulips and daffodils should be planted in the fall, 6-8 weeks before the first hard frost, to allow roots to establish. Summer-flowering bulbs like lilies and gladiolus are planted in the spring after the danger of frost has passed. Always check the specific requirements for your bulb variety to ensure optimal growth.
How deep should I plant bulbs in containers?
Plant bulbs at a depth of 2-3 times their height, with the pointed side facing up. In pots, you can layer smaller bulbs on top of larger ones, known as the lasagna method, to maximize space. Cover the bulbs with soil and water gently to settle them in.
What type of soil is best for planting bulbs in pots?
Use a well-draining potting mix rich in organic matter to prevent rot and promote healthy growth. Avoid garden soil, as it can become compacted and may not drain well in containers. Adding perlite or sand can improve drainage if needed.
Do potted bulbs need drainage holes?
Yes, containers must have drainage holes to prevent waterlogging, which can cause bulbs to rot. Place a layer of gravel or broken pottery shards at the bottom of the pot to improve drainage. Ensure excess water can escape freely after watering.
How do I care for potted bulbs during winter?
In colder climates, move pots to a sheltered spot like an unheated garage or shed to protect bulbs from freezing. Water sparingly during dormancy, as bulbs don’t require much moisture when not actively growing. Insulate pots with bubble wrap or burlap if left outdoors.
Can I force bulbs to bloom indoors?
Yes, you can force bulbs like hyacinths, paperwhites, and amaryllis to bloom indoors by providing a period of cold stratification (for most bulbs) and then warm, bright conditions. Place bulbs in a cool, dark location for 10-12 weeks before moving them to a sunny spot. This mimics natural winter conditions and encourages early blooming.
Conclusion
Start by choosing quality bulbs, well-draining soil, and a suitable container with drainage holes. Place the pot in a sunny spot and enjoy the blooms.