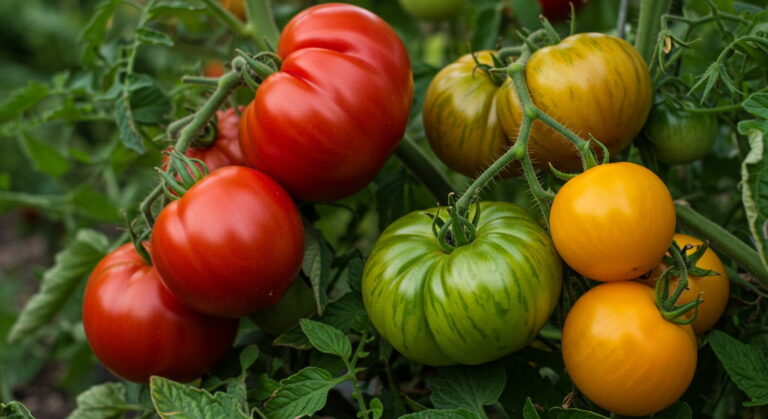
Camellia How To Plant
Ready to add a stunning camellia to your garden? From choosing the perfect spot to giving your camellia the best start, you’ll have all the answers you need. Let’s dive in and get your camellia thriving in no time!
How to Plant Camellias: Step-by-Step Guide
Choosing the Right Planting Time
Timing is everything when planting camellias to ensure they establish strong roots. The best time to plant is during fall or early spring when the weather is cool and moist. This gives the plant time to settle in before extreme temperatures hit.
Avoid planting in the heat of summer, as the stress can harm young plants. If you live in a region with harsh winters, early spring is safer, allowing roots to grow before the ground freezes.
Always water the plant well after planting and keep the soil consistently moist but not waterlogged. Mulching around the base helps retain moisture and regulate temperature. By planting at the right time, you give your camellia the best chance to thrive and produce beautiful blooms for years to come.
Selecting the Perfect Site
Camellias thrive in spots that offer partial shade, especially protection from harsh afternoon sun. Too much direct sunlight can scorch the leaves, while deep shade may reduce flowering. Look for a location with dappled sunlight, like under tall trees or near a north-facing wall.
Good air circulation is also key to preventing fungal diseases, so avoid crowded areas. Ensure the site has well-draining soil, as camellias hate sitting in water. If you’re planting in a container, choose a pot with drainage holes and place it where it gets morning sun.
By picking the right spot, you’ll enjoy healthier plants with vibrant blooms that light up your garden season after season.
Preparing the Soil for Camellias
Camellias love acidic, well-draining soil with a pH between 5.5 and 6.5. Before planting, test your soil to ensure it meets these requirements. If the soil is too alkaline, mix in elemental sulfur or peat moss to lower the pH.
Enrich the soil with organic matter like compost or well-rotted manure to improve drainage and fertility. Dig a hole twice as wide as the root ball but no deeper—planting too deep can suffocate the roots.
Gently loosen the roots before placing the plant in the hole, then backfill with the amended soil. Water thoroughly to settle the soil and remove air pockets. A 2-3 inch layer of mulch around the base will keep roots cool and moist.
Preparing the Planting Hole and Soil Mix
Digging the Correct Depth and Width
When planting your camellia, the size of the hole matters more than you might think. Start by digging a hole that is two to three times wider than the root ball. This gives the roots plenty of room to spread out and establish themselves quickly in the surrounding soil.
As for depth, aim for a hole that is no deeper than the root ball itself. The top of the root ball should sit slightly above the surrounding soil line, about an inch higher.
This prevents water from pooling around the base, which can lead to root rot—a common issue with camellias. Take your time to loosen the soil at the bottom and sides of the hole with a garden fork. This step encourages better root penetration and improves aeration.
Avoid roughing up the root ball too much; gently tease apart any circling roots at the edges, but leave the core intact. This careful preparation ensures your camellia gets off to a strong start without unnecessary stress.
Amending Soil for Optimal Drainage
Camellias thrive in acidic, well-draining soil, so amending the backfill soil is crucial. Mix the original soil you removed with organic matter like compost or peat moss to boost acidity and improve texture. A good rule of thumb is to blend in about one-third organic material to two-thirds native soil.
This combination retains moisture without becoming waterlogged, which camellias hate. If your soil is heavy clay, consider adding perlite or sand to enhance drainage further. Avoid using too much fertilizer at planting time; instead, rely on the organic amendments to provide a slow-release nutrient source.
Once the hole is prepared, place your camellia in the center and backfill with the amended mix, tamping it down lightly to eliminate air pockets. Finish with a 2-3 inch layer of mulch, like pine bark or shredded leaves, to keep the roots cool and moist.
Just ensure the mulch doesn’t touch the trunk to prevent rot.
Planting Your Camellia Correctly
Removing the Camellia from the Container
Before you pull your camellia out of its pot, give it a good drink to help the soil hold together. Gently lay the pot on its side and carefully slide the plant out, avoiding any tugging on the stems that might damage them.
If the roots are tightly wound around the root ball, take the time to tease them apart with your fingers or make a few vertical cuts with a sharp knife. This step is crucial because girdling roots can strangle the plant and stunt its growth as it matures.
By loosening the roots, you encourage them to spread outward into the surrounding soil, establishing a stronger foundation. Treat the roots gently during this process to minimize stress, ensuring your camellia gets the best possible start in its new home without being root-bound.
Positioning the Root Ball
Place your camellia in the center of the prepared hole, checking the depth carefully. The top of the root ball should sit slightly above the surrounding soil line, about an inch or so. This is vital because planting too deep often leads to rot and suffocation of the root system.
If the hole is too deep, add some soil back underneath the root ball until it reaches the correct height. Make sure the plant is standing straight up and looks aesthetically pleasing from all angles before you proceed.
Taking a moment to double-check this positioning now prevents future problems and ensures your shrub settles in properly. Visual alignment matters just as much as technical depth for a healthy, thriving garden addition.
Backfilling and Settling the Soil
Start filling the hole with the soil you removed, mixing in some organic matter like compost if your native dirt is heavy clay or sandy. As you backfill, lightly tamp the soil down with your hands to eliminate large air pockets without compacting it too tightly.
You want the roots to make contact with the soil but still have room to breathe and expand. Once the hole is filled, create a shallow basin around the base to hold water effectively. Water the plant deeply right away to help settle the soil further and hydrate the roots.
This initial soaking removes remaining air pockets and ensures the roots are snugly surrounded by moist earth.
Essential Aftercare for Newly Planted Camellias
Watering Techniques for Establishment
After planting your camellia, consistent watering is crucial for helping it settle in. For the first few weeks, water deeply 2-3 times a week, ensuring the soil stays moist but not waterlogged.
A good rule of thumb is to check the top inch of soil—if it’s dry, it’s time to water. As the plant establishes (usually within 6-12 months), you can reduce watering frequency but maintain deep sessions to encourage strong root growth.
Drip irrigation or a soaker hose works great to deliver water directly to the roots without splashing foliage, which can invite diseases. During hot or dry spells, pay extra attention to moisture levels, as camellias prefer steady hydration but hate sitting in soggy soil.
Mulching around the base (see below) will also help retain moisture between waterings.
Applying the Right Mulch
Mulching is a game-changer for newly planted camellias, helping to regulate soil temperature and retain moisture. Apply a 2-3 inch layer of organic mulch, such as shredded bark, pine needles, or leaf mold, around the base of the plant.
Keep the mulch a few inches away from the trunk to prevent rot and fungal issues. Pine needles are especially great because they slightly acidify the soil, which camellias love. Refresh the mulch annually to maintain its benefits.
Avoid using fresh wood chips, as they can deplete nitrogen from the soil as they decompose. A well-mulched camellia will stay cooler in summer, warmer in winter, and require less frequent watering. Plus, it gives your garden a polished, finished look while suppressing weeds that might compete for nutrients.
Staking if Necessary
Most camellias don’t need staking, but if yours is tall, top-heavy, or planted in a windy spot, temporary support can help it stand tall while roots establish.
Use a soft tie, like fabric or old pantyhose, to secure the stem to a sturdy stake, avoiding tight bindings that could damage the bark. Place the stake on the windy side to brace against gusts. Check the ties monthly and loosen them as the plant grows to prevent girdling.
Once the camellia’s roots are firmly anchored (usually after a year), remove the stake to encourage natural strength and flexibility. Over-staking can weaken plants, so only use it when absolutely necessary. A well-supported camellia will grow straighter and recover faster from planting stress, ensuring it thrives for years to come.
Sunlight and Location Requirements
Morning Sun vs. Afternoon Shade
When planting camellias, finding the perfect balance of sunlight is crucial for their health and vibrant blooms. Ideally, you want a spot that offers gentle morning sun followed by protective afternoon shade.
This arrangement allows your plant to soak up the essential early light it needs for energy without exposing it to the scorching intensity of a hot afternoon. Camellias thrive in this filtered light environment because it prevents their foliage from getting scorched, which can stress the plant and reduce flowering.
If you live in a region with very hot summers, prioritize the shade even more, perhaps placing them near a taller tree or the north side of a building.
However, be careful with deep, all-day shade; while they are shade-tolerant, too little sun can result in leggy growth and fewer flowers. A location with dappled sunlight throughout the day is often the next best option if direct morning sun isn’t available.
By observing how the light moves across your garden throughout the day, you can pinpoint the location where your camellia will feel most at home, ensuring it establishes strong roots and rewards you with stunning blooms season after season.
Protecting Camellias from Harsh Winds
Choosing a sheltered location is just as important as getting the light right when planting camellias. These plants have somewhat delicate root systems and tender buds that can suffer significantly from harsh winter winds or strong, drying gusts.
An unprotected site can quickly dry out the leaves and cause flower buds to drop before they even open, robbing you of that spectacular spring display. To prevent this, look for a planting spot near a fence, a wall, or a hedge that acts as a windbreak.
This barrier will deflect the strongest currents and create a calm microclimate that helps the plant retain moisture. Not only does this protect the plant during the cold months, but it also shields the large, glossy leaves from tearing during summer storms.
If your yard is particularly open, you might consider planting your camellia in a large pot that can be moved to a more sheltered area, such as a covered patio or against the house, during the peak of windy season.
Taking the time to secure a calm, wind-free pocket for your camellia ensures the plant stays hydrated and comfortable, leading to vigorous growth and an abundance of beautiful flowers.
Ongoing Maintenance for Healthy Growth
Fertilizing Schedule for Camellias
To keep your camellia thriving and producing vibrant blooms, a consistent fertilizing schedule is key. Start by applying a slow-release, acid-forming fertilizer in early spring, just as new growth begins to appear. This gives the plant a gentle boost as it exits dormancy.
Avoid using high-nitrogen fertilizers late in the season, as this can encourage tender new growth that might be damaged by frost. Instead, opt for a formula specifically designed for acid-loving plants, which typically contains essential micronutrients like iron.
A light application in mid-summer can also support the development of next year’s flower buds. Always water thoroughly after feeding to help the nutrients reach the root zone without causing burn.
If your soil is naturally poor, consider adding a layer of organic compost or well-rotted manure around the base of the plant annually. This not only feeds the soil but also improves drainage, which is crucial for camellia health.
Remember, less is often more with these plants; over-fertilizing can lead to weak stems and fewer flowers. Stick to a balanced approach, and your camellia will reward you with lush foliage and stunning blooms year after year.
Pruning Tips for Shape and Blooms
Pruning your camellia isn’t just about aesthetics—it’s also essential for encouraging better air circulation and more blooms. The best time to prune is right after the flowers fade, usually in late spring or early summer. This ensures you don’t accidentally remove next year’s developing buds.
Start by removing any dead, damaged, or diseased branches to maintain the plant’s overall health. Then, focus on thinning out crowded areas to improve light penetration and airflow, which helps prevent fungal issues. For shaping, aim for a natural, open form rather than a tight, manicured look.
Use sharp, clean pruning shears to make precise cuts just above a leaf node, which promotes new growth. If your camellia has become overgrown, don’t be afraid to do a heavier renovation prune, but do it gradually over a few years to avoid stressing the plant.
Regular light pruning is often better than drastic infrequent cuts. By keeping the center open and the structure balanced, you’ll not only enhance the plant’s appearance but also boost its blooming potential. With a little patience and care, your camellia will remain a beautiful focal point in your garden.
Troubleshooting Common Planting Issues
Signs of Transplant Shock
After planting your camellia, it’s normal to notice some initial stress, but recognizing the signs of transplant shock early can help you take action. Look for yellowing or dropping leaves, especially if the plant was moved during its active growing season.
You might also see wilting despite adequate watering, which indicates the roots are struggling to establish. To help your camellia recover, keep the soil consistently moist but not waterlogged, and apply a 2-3 inch layer of organic mulch to regulate soil temperature and retain moisture.
Avoid fertilizing immediately after planting, as this can stress the roots further. Instead, give the plant time to adjust—usually a few weeks—and mist the foliage occasionally to boost humidity.
If the plant seems severely stressed, consider providing some temporary shade with a cloth or by moving potted camellias to a sheltered spot until they perk up. Patience is key, as camellias can take a season to fully acclimate.
Dealing with Poor Drainage or Root Rot
Camellias thrive in well-draining soil, so poor drainage can quickly lead to root rot, a common issue that causes roots to suffocate and decay. If you notice yellowing leaves, mushy stems, or a foul smell from the soil, your plant may be suffering.
To fix this, improve soil drainage by amending the planting area with compost or perlite, which helps water flow freely. If your camellia is in a container, ensure it has drainage holes and consider repotting with a fresh, well-draining mix.
For in-ground plants, avoid planting in heavy clay or low-lying areas where water pools. If root rot has already set in, carefully trim away affected roots with sterilized tools and replant in drier soil.
Moving forward, water deeply but infrequently, allowing the top inch of soil to dry out between waterings. Adding a layer of mulch can also help prevent surface drying while maintaining balanced moisture levels.
Frequently Asked Questions
What is the best time to plant a camellia?
The best time to plant a camellia is in the fall or early spring when the soil is cool and moist. This allows the roots to establish before hot summer temperatures. Avoid planting during freezing winter months or the peak of summer heat.
What type of soil do camellias need?
Camellias thrive in acidic, well-draining soil with a pH between 5.5 and 6.5. They prefer soil rich in organic matter, like compost or peat moss. Poor drainage can lead to root rot, so avoid heavy clay soils.
How much sunlight does a camellia require?
Camellias prefer partial shade, especially protection from harsh afternoon sun. Morning sunlight with filtered afternoon shade is ideal. Too much direct sun can scorch leaves, while deep shade may reduce blooming.
How deep should I plant a camellia?
Plant the camellia slightly higher than it was in the nursery container, ensuring the root flare is just above the soil surface. Dig a hole twice as wide as the root ball to encourage lateral root growth. Backfill with the native soil amended with organic material.
How often should I water a newly planted camellia?
Water newly planted camellias deeply and regularly, keeping the soil consistently moist but not waterlogged. Mulch around the base to retain moisture and regulate soil temperature. Reduce watering frequency once the plant is established, typically after the first year.
Can camellias grow in containers?
Yes, camellias grow well in containers if the pot has good drainage and is filled with acidic, nutrient-rich potting mix. Choose a container slightly larger than the root ball to allow room for growth. Repot every 2-3 years as the plant matures.
Conclusion
Choose a shaded spot with well-draining, acidic soil. Mulch to retain moisture and protect roots. With proper care, your camellia will thrive and produce stunning blooms for years.