How To Plant Fall Garlic
Ready to grow your own delicious garlic? It’s surprisingly easy and gives you a head start on your garden. Let’s dig in and get your cloves in the ground for the best results ever
How to Plant Fall Garlic: A Step-by-Step Guide
Timing Your Planting for Maximum Cold Exposure
Getting the timing right is crucial for a bountiful garlic harvest next summer. You want to plant your cloves about 4 to 6 weeks before the ground freezes hard. This window gives the garlic enough time to develop strong roots without sprouting too much top growth before winter arrives.
In most regions, this means planting between late September and mid-November. If you plant too early, the garlic might sprout and be damaged by harsh frost. Planting too late means the roots won’t establish well, leaving cloves vulnerable to heaving during freeze-thaw cycles.
Check your local first frost date to pinpoint the perfect week for your specific area. The key is allowing roots to establish before the soil becomes unworkable.
This ensures your garlic wakes up ready to grow as soon as spring warmth returns, giving you a head start on the season and larger bulbs.
Preparing the Soil and Selecting the Right Site
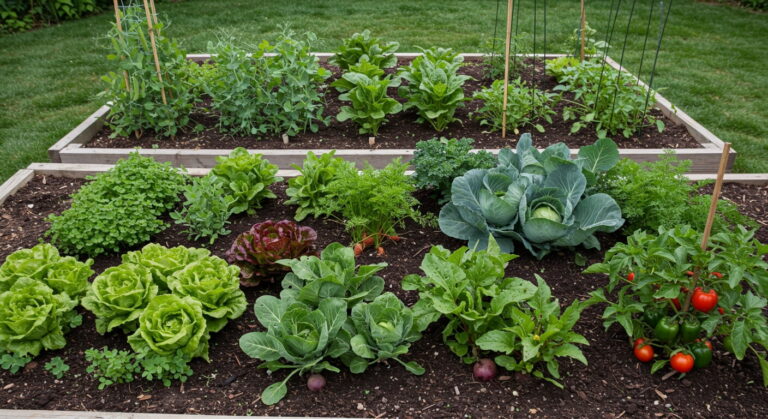
Garlic thrives in loose, well-draining soil that is rich in organic matter, so choose a sunny spot that hasn’t recently hosted onions or garlic to avoid disease. Start by removing any weeds and loosening the earth to a depth of at least six inches.
Mix in plenty of composted manure or balanced fertilizer to provide the nutrients necessary for healthy bulb development. Since garlic grows underground, compacted soil can restrict bulb expansion, leading to smaller harvests.
Avoid areas where water pools after heavy rain, as soggy soil can cause cloves to rot during the winter months. Ensure the site receives at least six to eight hours of direct sunlight daily.
Taking the time to properly amend your bed now pays off significantly, resulting in bigger, easier-to-peel bulbs. A little soil prep in the fall makes all the difference for a low-maintenance crop.
Planting Depth and Spacing Techniques for Large Bulbs
When it’s time to plant, break your garlic head into individual cloves, keeping the papery skins intact for protection. Choose the largest cloves for planting, as they produce the biggest bulbs. Place each clove pointy-side up, about two inches deep into the soil.
Spacing is just as important as depth; position cloves approximately four to six inches apart in rows spaced about a foot apart. This generous spacing allows air circulation and room for the bulbs to swell without competition.
After planting, cover the bed with a thick layer of mulch, like straw or shredded leaves, to insulate the soil. Mulching helps regulate soil temperature and prevents weeds from taking over. Proper spacing promotes airflow, which reduces fungal issues.
Following these specific techniques ensures your garlic has the physical room it needs to mature into impressive, flavorful heads by summer.
Choosing the Best Garlic Varieties for Your Climate
Hardneck vs. Softneck Garlic: Which Should You Grow?
When choosing garlic for your fall planting, the first decision is between hardneck and softneck varieties. Hardneck garlic thrives in colder climates and produces a stiff central stalk, often yielding delicious scapes in early summer. These varieties typically have larger cloves and bolder flavors but don’t store as long.
On the other hand, softneck garlic is better suited for milder climates and features flexible stalks, making them perfect for braiding. They generally have smaller cloves but boast a longer storage life, sometimes lasting up to a year.
For most gardeners in zones 3-6, hardneck is the go-to choice, while those in zones 7-9 will have more success with softneck types. Assess your winter temperatures and storage needs to pick the best option for your garden.
Top Performing Varieties for Northern Gardens
If you live in a region with harsh winters, hardneck varieties are your best bet for a successful harvest. One standout option is ‘Rocambole’, known for its complex, rich flavor and easy-to-peel cloves. Another excellent choice is ‘Porcelain’, which produces large bulbs and is quite cold-hardy.
‘Music’ is a favorite among northern growers for its high yields and robust taste, tolerating freezing temperatures well. Plant these cloves in the fall, about 4-6 weeks before the ground freezes, to establish strong roots before winter.
Adding a layer of mulch like straw or shredded leaves will protect the bulbs from deep freezes and temperature fluctuations. By selecting these hardy varieties and preparing your soil properly, you’ll ensure a bountiful garlic harvest come mid-summer.
Best Garlic Options for Southern and Warmer Climates
Gardeners in milder climates should focus on softneck garlic varieties, as they require less vernalization (cold exposure) to form bulbs. ‘Silverskin’ is a top pick, offering a classic garlic flavor and exceptional storage capabilities. ‘Artichoke’ garlic is another reliable option, producing large, flavorful bulbs that adapt well to warmer winters.
Unlike hardnecks, these varieties don’t produce scapes, directing all their energy into bulb development. Plant your cloves in late fall, ensuring they get enough chill hours during the cooler months.
In areas with mild winters, pre-chilling cloves in the refrigerator for a few weeks before planting can help mimic the necessary cold period. With the right selection and care, even gardeners in warmer zones can enjoy a thriving garlic crop.
Preparing Your Garden Bed for Fall Planting
Soil Requirements and pH Levels for Healthy Growth
For thriving fall garlic, start with well-draining soil that’s rich in organic matter. Garlic hates sitting in water, so sandy or loamy soils work best. Aim for a pH level between 6.0 and 7.0, which is slightly acidic to neutral.
If your soil is too acidic, add lime to raise the pH; if it’s too alkaline, sulfur can help lower it. Test your soil with a kit or send a sample to a local extension office for accurate results.
Proper pH ensures nutrients like nitrogen and phosphorus are readily available to the garlic. Avoid heavy clay soils unless you amend them heavily, as they can lead to rot. Preparing the soil now means your garlic cloves will have the best start for a bountiful harvest next summer.
Amending Soil with Compost and Fertilizers
Boost your soil’s fertility by mixing in 2-3 inches of compost before planting. Compost adds essential nutrients and improves soil structure, helping garlic roots grow strong. A balanced fertilizer, like a 10-10-10 blend, can also be worked into the top 6 inches of soil.
Avoid high-nitrogen fertilizers late in the season, as they can encourage excessive leaf growth instead of bulb development. If your soil is low in phosphorus, add bone meal or rock phosphate to support root growth. Organic options like well-rotted manure or worm castings are excellent choices too.
Spread amendments evenly and rake them into the soil. This step ensures your garlic has the nutrients it needs to overwinter and produce robust bulbs. Remember, healthy soil equals healthy garlic!
Techniques for Loosening Soil and Removing Weeds
Loosen your garden bed to a depth of 8-12 inches using a garden fork or tiller. This breaks up compacted soil, making it easier for garlic roots to spread and grow. As you work, remove any weeds, rocks, or debris that could compete with your garlic.
Weeds can steal nutrients and water, so a clean bed is crucial. For large areas, consider using a broadfork to aerate the soil without flipping it over. If you’re working with raised beds, a hand trowel or hoe works well.
After loosening, smooth the soil surface with a rake to create an even planting area. This step also helps water penetrate evenly. Take your time—thorough prep now means less work later and happier garlic plants!
Clove Preparation and Breaking the Bulb
Selecting the Largest Cloves for the Best Harvest
When you’re ready to plant your garlic this fall, size really does matter. Start by gently breaking apart your garlic bulb into individual cloves, being careful not to damage the base where the roots emerge. Once separated, sort through them and pick out the largest cloves for planting.
These big guys have more stored energy, which means they’ll produce stronger plants and bigger bulbs next summer. Smaller cloves can still grow, but they often result in undersized heads. It’s better to set those aside for cooking instead.
By focusing your planting efforts on the biggest, healthiest cloves, you’re setting yourself up for a more rewarding harvest. Remember, each clove you plant will grow into a full bulb, so choose wisely to maximize your yield and make the most of your garden space.
Why You Should Leave the Papery Skin Intact
As you handle your cloves, you might be tempted to peel off the flaky, papery skin, but it’s best to leave it alone. This delicate wrapper acts as a protective layer, helping to prevent fungal issues and keeping the clove moist while it establishes roots in the soil.
If you remove the skin, the clove becomes vulnerable to rotting or drying out before it gets a chance to grow. Think of it like a cozy coat for your garlic during the cold winter months.
You can gently brush off any loose dirt, but avoid peeling or scrubbing the cloves. Keeping that skin intact ensures your garlic gets the best start possible, leading to healthier growth when spring arrives. It’s a simple step that saves you trouble later on.
Identifying and Discarding Damaged or Diseased Cloves
Before you get your cloves in the ground, give each one a quick inspection to ensure it’s in top shape. Look for any signs of mold, discoloration, or soft spots, as these are clues that the clove might be diseased.
planting compromised cloves can lead to poor growth or spread problems to your soil, so it’s better to toss them into the compost or trash. Also, check for missing basal plates—the hard, flat part at the bottom—since cloves without this won’t develop roots.
It’s tough to throw away potential garlic, but planting only the healthiest cloves saves you disappointment later. Taking a few minutes now to quality-check your stock means your garden will be filled with vigorous plants ready to thrive through the winter and burst forth in spring.
Mulching and Protecting Garlic Over Winter
Why Mulching Is Critical for Winter Survival
Mulching is one of the most important steps when planting fall garlic because it protects your bulbs from harsh winter conditions. A thick layer of mulch acts as an insulating blanket, keeping soil temperatures stable and preventing frost heave, which can push bulbs out of the ground.
It also helps retain moisture, ensuring roots stay hydrated during dry spells. Without mulch, garlic bulbs are more likely to freeze or dry out, reducing your spring harvest. Additionally, mulch suppresses weeds, giving your garlic a head start once warmer weather arrives.
Don’t skip this step—your garlic will thank you come spring!
Best Materials for Garlic Mulch (Straw, Leaves, Hay)
Choosing the right mulch makes a big difference in garlic’s success. Straw is a top choice because it’s lightweight, breaks down slowly, and lets air circulate. Avoid hay, as it often contains seeds that can sprout into weeds.
Shredded leaves are another great option, especially if they’re dry and free of pests. Just make sure they’re not matted together, which can block water. If using grass clippings, mix them with other materials to prevent clumping.
Organic materials like these not only protect your garlic but also enrich the soil as they decompose, providing nutrients for next season’s growth.
How Thick Should Your Mulch Layer Be?
The ideal mulch thickness depends on your climate, but a good rule of thumb is 3-6 inches. In colder regions, aim for the higher end to ensure adequate insulation. Spread mulch evenly over the planted garlic bed, covering the soil completely.
If your area experiences heavy snowfall, you might need less, as snow also insulates. Layering mulch too thinly won’t protect bulbs from freezing, while too much can smother growth. After applying, gently check a few spots to ensure bulbs are covered but not buried too deep.
Adjust as needed for your local conditions to give your garlic the best chance of thriving.
Removing Mulch in Spring vs. Leaving It in Place
In spring, you can either remove mulch or leave it, depending on your goals. If the mulch is thick and compacted, gently pull it back to let emerging shoots access sunlight and air. If it’s loose and breaking down, leaving it can help retain moisture and suppress weeds.
Spring mulching also continues to feed the soil as it decomposes. Monitor your garlic—if shoots are struggling to push through, thin the mulch slightly. Leaving a lighter layer in place can also protect tender shoots from late frost snaps.
Just avoid smothering new growth, and you’ll enjoy a healthier, low-maintenance garlic crop.
Caring for Garlic Through the Seasons
Watering Needs: Fall, Winter, and Spring
Once you’ve planted your garlic cloves in the fall, give them a good soaking to help settle the soil. This initial watering encourages roots to establish before the ground freezes. Don’t overwater after this, as excess moisture can cause the cloves to rot.
Throughout winter, the dormant garlic needs little attention since snow or rain usually provides enough moisture. As spring arrives, check the soil regularly and water whenever the top inch feels dry. Garlic needs about an inch of water weekly during its active growing season.
The most crucial time to keep up with watering is during the bulb bulbing phase in late spring. Consistent moisture is key here; if the plants dry out, the bulbs will be smaller.
Stop watering completely about two weeks before you plan to harvest, as this lets the papery skins dry out and cure properly for storage.
Fertilizing Schedule for Spring Green Growth
Garlic is a heavy feeder, and giving it the right nutrients at the right time leads to impressive bulb size. In early spring, when the green shoots start poking through the mulch, it’s time for the first feeding.
Apply a nitrogen-rich fertilizer, like blood meal or fish emulsion, to fuel leafy growth. Since garlic takes many months to mature, it benefits from a second application a few weeks later.
You can side-dress the plants by sprinkling the fertilizer along the row and gently working it into the soil surface. Always water well after feeding to deliver those nutrients down to the roots. Leafy greens are essential because they produce the energy needed for the bulb to expand.
Avoid fertilizing too late in the season, though, because excessive nitrogen once bulbing begins can actually reduce your storage life and flavor intensity.
Managing Weeds Without Damaging the Roots
Weeds are your garlic patch’s biggest enemy because they steal water and nutrients from your developing crop. Since garlic has a shallow root system, it can’t compete well with aggressive weeds, so staying on top of them is vital.
The best strategy is to hand-pull weeds carefully when the soil is moist to avoid disturbing the bulbs. If you use a hoe, keep it shallow and steer clear of the plant base to prevent slicing into the roots.
A thick layer of organic mulch, like straw, is your best friend here. It suppresses weed growth and retains soil moisture, which means less work for you later. Mulch heavily immediately after planting in the fall and maintain it through spring.
This creates a barrier that stops weed seeds from taking root while protecting your garlic plants from harsh temperature fluctuations.
Harvesting and Curing Your Fall-Planted Garlic
Signs Your Garlic Is Ready to Harvest
Knowing exactly when to harvest your garlic is crucial for the best flavor and storage life. Watch for the leaves to turn brown and dry out, typically when about half to two-thirds of the foliage has yellowed.
This usually happens in late spring or early summer, depending on your planting date. Gently scrape away some soil near the bulb to check its size without disturbing the roots too much. You want firm, well-formed cloves wrapped in papery skin.
Avoid waiting too long, as overripe garlic bulbs may split open or start to rot in the ground. Timing is everything, so keep a close eye on your plants as they mature.
Trust your instincts and check frequently during the expected harvest window to ensure you catch them at their peak.
Proper Techniques for Pulling and Digging Up Bulbs
When it’s time to harvest, choose a dry, sunny day to make the process easier. Loosen the soil around the bulbs carefully with a garden fork or spade, keeping a safe distance to avoid piercing or damaging them.
Gently lift the garlic from the ground, grasping the stalk near the base and pulling steadily. Handle bulbs gently to prevent bruising, which can lead to premature spoilage. Shake off excess soil but avoid washing the bulbs, as moisture can encourage mold during curing.
Lay the harvested garlic in a single layer in a shady, well-ventilated spot for a day or two to let any surface moisture dry off. This initial drying step sets the stage for successful curing and long-term storage.
How to Cure Garlic for Long-Term Storage
Curing is essential to extend the shelf life of your garlic and enhance its flavor. Bundle the garlic plants together in small groups of 5-10 and hang them upside down in a warm, dry, and well-ventilated area. A garage, shed, or covered porch works perfectly.
Aim for temperatures around 60-80°F with good air circulation to prevent mold growth. Let the garlic cure for 2-4 weeks until the outer skins are papery and the roots feel dry. Once cured, trim the stalks to about an inch above the bulb and trim the roots.
Store your garlic in a cool, dark place in mesh bags or baskets to ensure airflow. Properly cured garlic can last for months, giving you a delicious supply from your fall planting.
Frequently Asked Questions
When is the best time to plant fall garlic?
The ideal time to plant garlic is in the fall, about 4-6 weeks before the ground freezes. This allows the cloves to establish roots before winter sets in, ensuring strong growth in spring. Aim for planting between late September and November, depending on your climate zone.
How do I prepare the soil for planting garlic?
Garlic thrives in well-draining, loose soil rich in organic matter. Loosen the soil to a depth of 6-8 inches and mix in compost or aged manure to improve fertility and drainage. Avoid planting in compacted or waterlogged soil, as this can cause rot.
How deep and far apart should I plant garlic cloves?
Plant garlic cloves pointy side up, about 2 inches deep, with the base of the clove 1-2 inches below the soil surface. Space cloves 4-6 inches apart in rows to allow room for bulbs to grow. Mulch with 3-4 inches of straw or leaves to protect the cloves during winter.
What type of garlic should I plant in the fall?
Hardneck garlic varieties are best for cold climates, producing flavorful cloves and scapes in spring. Softneck garlic varieties are better suited for milder climates and store longer. Choose seed-grade cloves from a reputable source for the best results.
Do I need to water garlic after planting in the fall?
Water the garlic immediately after planting to help settle the soil and encourage root growth. If the fall is dry, water occasionally, but reduce watering as winter approaches to prevent rot. Resume watering in spring when growth resumes.
Can I plant garlic from store-bought bulbs?
It’s not recommended to plant garlic from store-bought bulbs, as they may be treated with growth inhibitors or carry diseases. Instead, use certified disease-free seed garlic from a garden center or trusted supplier. This ensures healthier plants and better yields.
How do I protect garlic over the winter?
After planting, cover the garlic bed with a thick layer of mulch, such as straw, shredded leaves, or grass clippings. This insulates the soil, regulates temperature, and prevents frost heaving. Remove the mulch gradually in early spring to allow new shoots to emerge.
Conclusion
answer”: “Hardneck garlic varieties are best for cold climates, producing flavorful cloves and scapes in spring. Softneck garlic varieties are better suited for milder climates and store longer. Choose seed-grade cloves from a reputable source for the best results.