How To Grow Peas From Seed
{ “h2”: “How to Grow Peas from Seed: A Step-by-Step Guide”, “h3_list”: [ “Preparing Your Seeds for Faster Germination”, “Choosing the Optimal Planting Time”, “Correct Sowing Depth and Spacing for Success”, “Caring for Your Seedlings After Planting” ] }, { “h2”: “Selecting the Best Pea Varieties for Your Garden”, “h3_list”: [ “Differences Between Shelling, Snow, and Snap Peas”, “Choosing Between Bush and Pole (Climbing) Peas”, “Top-Performing Heirloom and Hybrid Varieties” ] }, { “h2”: “Preparing the Ideal Soil Conditions for Peas”, “h3_list”: [ “Why Well-Draining Soil is Essential”, “Testing and Adjusting Soil pH for Peas”, “How to Add Organic Matter Without Excess Nitrogen” ] }, { “h2”: “Essential Care Tips for Growing Peas”, “h3_list”: [ “How Much Water Do Pea Plants Need?”, “The Importance of Mulching to Retain Moisture”, “Do You Need to Fertilize Peas During the Growing Season?” ] }, { “h2”: “How to Support and Train Your Pea Plants”, “h3_list”: [ “DIY Trellis Ideas for Bush and Pole Varieties”, “Proper Techniques for Training Vines Onto Supports”, “Managing Pea Plants in Small Spaces or Containers” ] }, { “h2”: “Protecting Peas from Pests and Diseases”, “h3_list”: [ “Identifying and Preventing Common Pea Pests Like Aphids”, “Managing Fungal Issues such as Powdery Mildew”, “Using Netting to Protect Seeds and Pods from Birds” ] }, { “h2”: “How and When to Harvest Peas for Maximum Flavor”, “h3_list”: [ “Signs That Your Peas Are Ready to Pick”, “Best Techniques for Harvesting Without Damaging Vines”, “Storing and Preserving Your Pea Harvest” ] }
How to Grow Peas from Seed: A Step-by-Step Guide
Preparing Your Seeds for Faster Germination
To give your pea seeds a head start, soak them in room temperature water for 12 to 24 hours before planting. This simple trick softens the hard outer seed coat and helps the seeds absorb moisture much faster, which speeds up germination significantly.
After soaking, plant them immediately while they are slightly plump but not swollen. Avoid leaving them in water too long, or they might rot. This step is especially useful if you are planting in early spring when the soil is still cool and dry.
By preparing your seeds this way, you’ll see sprouts popping up in just a week or two instead of waiting longer for nature to take its course.
Choosing the Optimal Planting Time
Timing is everything when growing peas because these cool-season crops thrive in crisp weather. You should sow seeds directly outdoors as soon as the soil is workable in early spring, about 4 to 6 weeks before your last expected frost date.
Peas can tolerate light frosts and actually prefer cooler temperatures over heat. For a continuous harvest, consider planting a second batch in late summer for a fall crop.
Just make sure to avoid planting in the heat of mid-summer, as high temperatures can cause the plants to wither and stop producing pods. Getting them in the ground early ensures sweet, tender peas.
Correct Sowing Depth and Spacing for Success
Plant your pea seeds about 1 to 2 inches deep to protect them from birds and retain moisture. Space the seeds roughly 2 inches apart in rows that are 18 to 24 inches apart.
This spacing gives the plants plenty of room to grow and ensures good air circulation, which helps prevent fungal diseases. If you are planting a bush variety, they might need less space, while taller climbing varieties will require a trellis or support structure.
Gently firm the soil over the seeds and water them well right after planting. Proper spacing and depth are crucial for strong root development and healthy vines that are easy to harvest later in the season.
Caring for Your Seedlings After Planting
Once your seedlings emerge, keep the soil consistently moist but not waterlogged, especially during dry spells. Apply a layer of mulch around the base of the plants to help retain moisture and suppress weeds. As the vines grow, guide them gently onto your support structure to encourage upward growth.
Peas generally don’t need much fertilizer, but a light application of compost can give them a boost. Watch out for pests like aphids and birds, and protect your plants if necessary.
With just a little bit of attention and regular watering, your seedlings will grow into vigorous plants ready to produce a bountiful harvest.
Selecting the Best Pea Varieties for Your Garden
Differences Between Shelling, Snow, and Snap Peas
When you want to grow peas from seed, it is essential to pick the right type for your kitchen needs. Shelling peas (or garden peas) are grown for their sweet seeds; you must discard the tough, fibrous pods before eating.
Snow peas are harvested while flat and are prized for their crunchy, edible pods in stir-fries. Snap peas, also known as sugar snaps, offer the best of both worlds with plump, sweet seeds and juicy, snappable pods. Choosing the correct variety dictates when you harvest.
For the sweetest flavor, pick shelling peas when the pods are round and full. Conversely, snow peas should be picked almost immediately after flowers fade to ensure the pods stay tender. Understanding these basic distinctions ensures you enjoy the specific texture and taste profile you crave from your homegrown harvest.
Choosing Between Bush and Pole (Climbing) Peas
To successfully grow peas from seed, you must decide between bush varieties that stand on their own and climbing types that require support. Bush peas generally grow compactly, reaching about two feet tall, making them an excellent choice for small gardens or containers where space is tight.
On the other hand, pole peas are vigorous vines that can easily climb six feet or more, requiring a sturdy trellis or fence to thrive. While bush peas often mature slightly faster, pole peas usually produce a higher yield over a longer period by continuing to vine upward.
If you have limited horizontal space, go vertical with climbing peas to maximize your harvest. Conversely, if you prefer low-maintenance gardening without setting up structures, stick to the manageable bush types for a quick and satisfying crop.
Top-Performing Heirloom and Hybrid Varieties
Selecting the right cultivar is the secret to a thriving pea patch, regardless of your local climate. Reliable heirloom varieties, like ‘Alaska’ or the classic ‘Tall Telephone’, offer tried-and-true flavor and have been saving gardeners time for generations.
If you are looking for disease resistance and uniformity, modern hybrid varieties such as ‘Super Sugar Snap’ are fantastic options that hold up well against fusarium wilt.
Consider your growing season carefully; ‘Wando’ is a notably heat-tolerant variety perfect for late spring planting, while ‘Little Marvel’ is an early producer ideal for short seasons. Don’t be afraid to plant a mix of both types to extend your harvest window.
By choosing seeds adapted to your specific region, you ensure a bountiful supply of fresh pods straight from the vine to your table.
Preparing the Ideal Soil Conditions for Peas
Why Well-Draining Soil is Essential
To grow peas from seed successfully, you must start with well-draining soil because pea seeds are prone to rotting if they sit in water for too long. Peas prefer a loose, crumbly texture that allows roots to spread easily and excess moisture to escape.
Heavy clay soil can compact, making it hard for tender seedlings to push through, while sandy soil drains too quickly. Aim for a balance by working the soil to a depth of about 12 inches, breaking up any large clumps.
If your ground holds water like a sponge, consider raised beds or adding gritty sand to improve airflow. Good drainage also prevents fungal diseases that thrive in damp conditions, ensuring your plants get the oxygen they need.
Remember, soggy soil is the enemy of healthy pea seeds, so take the time to prepare a friable bed before you plant.
Testing and Adjusting Soil pH for Peas
Peas thrive best when the soil pH is slightly neutral to slightly acidic, ideally between 6.0 and 7.5. Testing your soil is a smart move because it tells you exactly what amendments are needed for optimal nutrient absorption.
You can easily use an inexpensive home test kit or send a sample to a local extension service. If your soil is too acidic, adding garden lime will help raise the pH, while elemental sulfur can lower it if the soil is too alkaline.
Getting this balance right is crucial because peas rely on beneficial bacteria to fix nitrogen in their roots, and these bacteria work best in the correct pH range.
Don’t skip this step; adjusting the pH before planting ensures your pea seeds can access the nutrients they need immediately upon germination, leading to stronger, more productive plants.
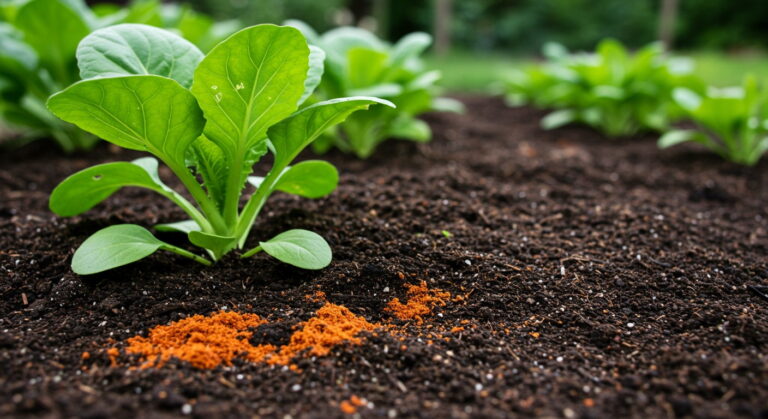
How to Add Organic Matter Without Excess Nitrogen
While peas love rich soil, they have a unique relationship with nitrogen, so you must be careful not to overdo it. Peas produce their own nitrogen with the help of root bacteria, so adding too much synthetic fertilizer will actually encourage lush leafy growth at the expense of pea pods.
Instead, focus on incorporating organic matter like well-rotted compost or aged manure into the soil a few weeks before planting. These materials improve soil structure and water retention without overwhelming your plants with nitrogen. A layer of compost a few inches deep mixed into the topsoil is usually perfect.
This approach feeds the soil microbiome, which in turn supports your pea plants. Keep the fertilizer light, especially on the nitrogen side, to ensure your energy goes into producing delicious peas rather than just vines.
Essential Care Tips for Growing Peas
How Much Water Do Pea Plants Need?
Peas thrive with consistent moisture, especially once they start flowering and producing pods. When growing from seed, it’s crucial to keep the soil evenly moist but not waterlogged to encourage strong germination.
As the plants mature, aim to provide about one inch of water per week, adjusting for rainfall or hot spells. It’s best to water deeply at the soil level early in the morning to prevent fungal diseases.
If the plants dry out too much, they may drop their flowers or produce stunted, tough peas. Mulching can help maintain this consistency, but keep an eye on the weather; during dry spells, you might need to water more frequently to keep those tender roots happy and hydrated.
The Importance of Mulching to Retain Moisture
Applying a thick layer of organic mulch around your pea plants is a game-changer for maintaining soil health and moisture. Peas have shallow root systems that can quickly dry out in the sun, so mulch acts as a protective barrier to regulate soil temperature and suppress weeds.
Materials like straw, shredded leaves, or grass clippings work perfectly. Spread about two to three inches around the base of the plants, taking care not to bury the stems. This simple step significantly reduces water evaporation, meaning you’ll spend less time dragging the hose around.
Plus, as the mulch breaks down, it adds valuable organic matter to the soil, giving your peas a nutrient boost naturally.
Do You Need to Fertilize Peas During the Growing Season?
Generally, peas are light feeders and often don’t require heavy fertilization if planted in decent soil. In fact, because they are legumes capable of fixing nitrogen, they can actually enrich your garden soil.
If you amended your soil with compost before planting, that is usually sufficient support for the entire season. Avoid using high-nitrogen fertilizers, as these will encourage lush, leafy growth at the expense of pods.
If your plants look pale or yellowish despite proper watering, a light side-dressing of compost or a balanced organic fertilizer can give them a gentle nudge. Focus on keeping the soil healthy rather than force-feeding the plants, and you will likely be rewarded with a bountiful harvest.
How to Support and Train Your Pea Plants
DIY Trellis Ideas for Bush and Pole Varieties
When growing peas from seed, providing the right support is key to a healthy harvest. For bush varieties, a simple sturdy twig fence or low mesh netting works wonders, as these plants stay compact.
Pole peas, however, need taller structures like bamboo tepees or a DIY trellis made from repurposed pallets. String twine between poles for an easy, cost-effective option. Ensure your trellis is 4–6 feet tall to accommodate climbing vines. Place it in the garden before sowing seeds to avoid damaging roots later.
Peas love to climb, so give them something to grab onto early. Whether you’re using old branches, chicken wire, or a purchased trellis, make sure it’s anchored well—windy days can topple flimsy supports. A little creativity goes a long way in keeping your pea plants happy and productive!
Proper Techniques for Training Vines Onto Supports
Once your pea seedlings sprout, gently guide them toward their trellis. Peas have tendrils that naturally wrap around supports, but they may need help finding their way. Use soft ties or strips of old fabric to loosely secure vines, being careful not to crush stems.
Check plants weekly and redirect any straying stems. Avoid pulling them forcefully, as this can damage the delicate vines. Instead, gently weave them through the trellis or wrap tendrils around the support.
For bush peas, occasional pruning keeps them tidy, while pole peas benefit from regular checks to ensure they’re climbing evenly. Training early makes harvesting easier and prevents overcrowding. With patience, your peas will thrive, producing more pods for your kitchen!
Managing Pea Plants in Small Spaces or Containers
Short on garden space? Peas grow beautifully in containers or small raised beds. Choose compact bush varieties or dwarf pole peas for tight spots. A 5-gallon pot with a trellis or obelisk is perfect for a single plant, while window boxes can host a few bush peas.
Ensure containers have drainage holes and use nutrient-rich soil. Place them where they get 6+ hours of sunlight daily. Train vines onto a small bamboo stake or trellis netting to maximize vertical space. Regular watering is crucial, as containers dry out faster than garden beds.
Mulching helps retain moisture and keeps roots cool. With these tricks, even a tiny balcony can yield a bountiful pea crop!
Protecting Peas from Pests and Diseases
DIY Trellis Ideas for Bush and Pole Varieties
When growing peas from seed, providing the right support is key to a healthy harvest. For bush varieties, a simple sturdy twig fence or low mesh netting works wonders, as these plants stay compact.
Pole peas, however, need taller structures like bamboo tepees or a DIY trellis made from repurposed pallets. String twine between poles for an easy, cost-effective option. Ensure your trellis is 4–6 feet tall to accommodate climbing vines. Place it in the garden before sowing seeds to avoid damaging roots later.
Peas love to climb, so give them something to grab onto early. Whether you’re using old branches, chicken wire, or a purchased trellis, make sure it’s anchored well—windy days can topple flimsy supports. A little creativity goes a long way in keeping your pea plants happy and productive!
Proper Techniques for Training Vines Onto Supports
Once your pea seedlings sprout, gently guide them toward their trellis. Peas have tendrils that naturally wrap around supports, but they may need help finding their way. Use soft ties or strips of old fabric to loosely secure vines, being careful not to crush stems.
Check plants weekly and redirect any straying stems. Avoid pulling them forcefully, as this can damage the delicate vines. Instead, gently weave them through the trellis or wrap tendrils around the support.
For bush peas, occasional pruning keeps them tidy, while pole peas benefit from regular checks to ensure they’re climbing evenly. Training early makes harvesting easier and prevents overcrowding. With patience, your peas will thrive, producing more pods for your kitchen!
Managing Pea Plants in Small Spaces or Containers
Short on garden space? Peas grow beautifully in containers or small raised beds. Choose compact bush varieties or dwarf pole peas for tight spots. A 5-gallon pot with a trellis or obelisk is perfect for a single plant, while window boxes can host a few bush peas.
Ensure containers have drainage holes and use nutrient-rich soil. Place them where they get 6+ hours of sunlight daily. Train vines onto a small bamboo stake or trellis netting to maximize vertical space. Regular watering is crucial, as containers dry out faster than garden beds.
Mulching helps retain moisture and keeps roots cool. With these tricks, even a tiny balcony can yield a bountiful pea crop!
How and When to Harvest Peas for Maximum Flavor
DIY Trellis Ideas for Bush and Pole Varieties
When growing peas from seed, providing the right support is key to a healthy harvest. For bush varieties, a simple sturdy twig fence or low mesh netting works wonders, as these plants stay compact.
Pole peas, however, need taller structures like bamboo tepees or a DIY trellis made from repurposed pallets. String twine between poles for an easy, cost-effective option. Ensure your trellis is 4–6 feet tall to accommodate climbing vines. Place it in the garden before sowing seeds to avoid damaging roots later.
Peas love to climb, so give them something to grab onto early. Whether you’re using old branches, chicken wire, or a purchased trellis, make sure it’s anchored well—windy days can topple flimsy supports. A little creativity goes a long way in keeping your pea plants happy and productive!
Proper Techniques for Training Vines Onto Supports
Once your pea seedlings sprout, gently guide them toward their trellis. Peas have tendrils that naturally wrap around supports, but they may need help finding their way. Use soft ties or strips of old fabric to loosely secure vines, being careful not to crush stems.
Check plants weekly and redirect any straying stems. Avoid pulling them forcefully, as this can damage the delicate vines. Instead, gently weave them through the trellis or wrap tendrils around the support.
For bush peas, occasional pruning keeps them tidy, while pole peas benefit from regular checks to ensure they’re climbing evenly. Training early makes harvesting easier and prevents overcrowding. With patience, your peas will thrive, producing more pods for your kitchen!
Managing Pea Plants in Small Spaces or Containers
Short on garden space? Peas grow beautifully in containers or small raised beds. Choose compact bush varieties or dwarf pole peas for tight spots. A 5-gallon pot with a trellis or obelisk is perfect for a single plant, while window boxes can host a few bush peas.
Ensure containers have drainage holes and use nutrient-rich soil. Place them where they get 6+ hours of sunlight daily. Train vines onto a small bamboo stake or trellis netting to maximize vertical space. Regular watering is crucial, as containers dry out faster than garden beds.
Mulching helps retain moisture and keeps roots cool. With these tricks, even a tiny balcony can yield a bountiful pea crop!
Frequently Asked Questions
When is the best time to plant pea seeds?
Peas thrive in cool weather, so plant them as soon as the soil can be worked in early spring, about 4-6 weeks before the last frost. For a fall harvest, sow seeds in late summer, 8-10 weeks before the first frost. Avoid planting in hot weather, as peas struggle in temperatures above 75°F (24°C).
How do I prepare the soil for planting peas?
Peas prefer well-draining, loamy soil with a pH of 6.0-7.5. Enrich the soil with compost or aged manure before planting to provide nutrients. Avoid heavy nitrogen fertilizers, as peas fix their own nitrogen from the air.
How deep should I plant pea seeds?
Plant pea seeds about 1-2 inches (2.5-5 cm) deep, spaced 1-2 inches apart in rows. For vining varieties, leave 18-24 inches between rows to allow room for trellising. Water gently after planting to settle the soil.
Do pea seeds need to be soaked before planting?
Soaking pea seeds in water for 12-24 hours before planting can speed up germination, especially in dry conditions. However, it’s not strictly necessary if the soil is already moist. Avoid oversoaking, as seeds may rot.
How much sunlight do pea plants need?
Peas need at least 6 hours of direct sunlight daily for optimal growth. In hotter climates, some afternoon shade can help protect the plants from heat stress. Full sun is best for cooler regions.
How do I support vining pea plants?
Vining peas (such as ‘Sugar Snap’ or ‘Snow peas’) need a trellis, stakes, or netting to climb. Install supports at planting time to avoid damaging roots later. Bush varieties don’t require staking but may benefit from low supports for stability.
How often should I water pea plants?
Peas need consistent moisture, so water them deeply once or twice a week, depending on rainfall. Avoid waterlogging, as it can cause root rot. Mulching around the base helps retain soil moisture and suppress weeds.
When are peas ready to harvest?
Harvest peas when the pods are plump but still tender, usually 60-70 days after planting. Pick them regularly to encourage continued production. For snap peas, harvest when the pods are crisp; for shelling peas, wait until the peas inside are full-sized.
Conclusion
Growing peas from seed is a rewarding and straightforward process. Start by choosing a sunny spot, preparing well-draining soil, and sowing seeds at the right time. Support climbing varieties with trellises and keep soil consistently moist. With patience, you’ll enjoy a bountiful harvest of fresh, sweet peas. Don’t be discouraged by initial challenges—practice makes perfect. Grab your seeds, follow these tips, and start your pea-growing journey today for a delicious homegrown bounty!