How To Plant Flowers
Ready to transform your yard into a blooming paradise? Follow these simple tips, and you’ll enjoy vibrant flowers in no time. Let’s get your garden growing!
How to Plant Flowers: A Step-by-Step Guide for Beginners
Choose the Right Location for Sun and Shade Needs
Start by checking the light requirements of your flowers. Some plants love full sun, needing at least six hours of direct sunlight daily, while others thrive in partial or full shade. Observe your yard throughout the day to see which spots get the most light.
Match the plants to the right conditions to ensure they grow strong and bloom beautifully. If you’re unsure, opt for versatile varieties that can tolerate a mix of sun and shade.
Remember, the right location is the foundation of a healthy garden, so take your time to assess the space before planting.
Prepare the Soil Before Planting
Healthy soil is key to vibrant flowers. Begin by clearing the area of weeds, rocks, and debris. Loosen the soil with a garden fork or tiller to about 12 inches deep, allowing roots to spread easily.
Mix in organic matter like compost or aged manure to improve drainage and add nutrients. This step ensures your flowers have the best start. If your soil is heavy clay or sandy, organic amendments can balance its texture. A well-prepared bed reduces future maintenance and helps your plants establish quickly.
Dig the Proper Hole and Space Your Flowers Correctly
When planting, dig a hole roughly twice as wide as the root ball but no deeper than the container. Gently remove the plant from its pot, loosen the roots, and place it in the hole. Space flowers according to their mature size to prevent overcrowding and promote air circulation.
This reduces the risk of disease and allows each plant to thrive. Fill the hole with soil, pressing lightly to remove air pockets. Proper spacing and hole depth are simple steps that make a big difference in your garden’s long-term success.
Water and Mulch to Help Flowers Settle In
After planting, water thoroughly to help the soil settle around the roots. Focus on the base of the plant to avoid wetting the foliage, which can encourage disease. Apply a layer of mulch around the flowers, about 2-3 inches deep, to retain moisture and suppress weeds.
Keep mulch a few inches away from the plant stems to prevent rot. Water regularly for the first few weeks, especially during dry spells, to help your new flowers establish strong roots and adjust to their new home.
Choosing the Best Flowers for Your Garden
Annuals vs. Perennials: What’s the Difference?
Choosing between annuals and perennials is your first step in planning a vibrant flower garden. Annuals like petunias and marigolds complete their entire life cycle in one growing season, offering continuous, bold blooms from spring until the first frost.
They are perfect for filling empty spots quickly or adding pops of color to containers and window boxes. Perennials, such as hostas or daylilies, come back year after year, which saves you time and effort on replanting.
While they often have a shorter bloom period compared to annuals, they provide reliable structure and enduring beauty to your landscape. For the best display, consider mixing both types: plant annuals for immediate, season-long gratification and perennials for a lasting foundation that matures over time.
This combination ensures your garden remains lively and dynamic throughout the changing seasons.
Selecting Flowers That Thrive in Your Hardiness Zone
To ensure your flowers survive and thrive, you must choose plants adapted to your local climate, known as your USDA Hardiness Zone. This map divides regions based on average minimum winter temperatures, guiding you to pick perennials that can withstand the coldest weather in your area.
Planting a flower meant for a warmer zone in a cold region often leads to disappointment, as the plant may not survive the winter. Before shopping, check your zone online and read plant tags carefully to find matches.
Local nurseries usually stock the best varieties for your specific region, making them a great resource. Selecting zone-appropriate plants reduces maintenance and increases the likelihood of a successful, flourishing garden without needing excessive protection or replacement during extreme weather events.
Picking Flowers Based on Bloom Time and Color
Creating a garden that looks stunning all season requires careful planning of bloom times and color palettes. Select a mix of early bloomers, mid-season stars, and late-fall favorites to ensure there is always something flowering in your beds.
For example, pair spring tulips with summer coneflowers and autumn asters for a seamless transition of color. When choosing colors, consider the mood you want to set. Warm tones like reds and yellows create energy, while cool blues and purples offer a calming, serene atmosphere.
You can opt for a monochromatic scheme for a sophisticated look or a wild mix of complementary colors for a cottage-style feel. Don’t forget foliage texture; varying leaf shapes and colors adds depth and interest even when flowers aren’t at their peak.
Preparing Your Soil for Healthy Blooms
Testing Your Soil pH and Nutrient Levels
Before you dig, grab a simple soil test kit from your local garden center. This small step saves you a lot of heartache later because it tells you exactly what your flowers are hungry for.
Most flowers thrive in a slightly acidic to neutral pH range, usually around 6.0 to 7.0. If your soil is too sour or too sweet, your plants simply cannot absorb the nutrients they need, no matter how much fertilizer you add.
The test results will guide you on whether you need to add lime to raise the pH or sulfur to lower it. You will also get a read on essential nutrients like nitrogen, phosphorus, and potassium.
Taking the time to assess these levels ensures your beds are ready for optimal growth from day one.
Amending Soil with Compost and Organic Matter
Now that you know what your soil needs, it is time to boost its health by mixing in rich organic material. Spread a layer of well-rotted compost or aged manure about two to three inches thick over the top of your planting bed.
Then, use a garden fork or a tiller to work this goodness into the top 6 to 12 inches of earth. This process improves the soil structure dramatically, making it loose and crumbly so roots can easily spread out.
Organic matter acts like a sponge, holding moisture and releasing nutrients slowly over time. It also encourages beneficial microbes and earthworms that keep the soil alive.
Whether you have sandy ground that drains too fast or heavy clay that stays hard, adding organic amendment is the best way to create the perfect environment for healthy blooms.
Improving Drainage to Prevent Root Rot
Nothing kills a new flower bed faster than soggy roots, so ensuring your soil drains well is absolutely critical. If water pools on the surface for hours after a heavy rain, you need to take action to improve aeration.
Start by loosening the soil deep down, about 12 inches, to break up any hard-packed layers that trap water. You can also mix in coarse materials like perlite or gritty sand to help open up the soil structure.
If your yard has a serious drainage issue, consider building raised beds or mounding the soil up slightly. Proper drainage ensures that air reaches the roots, which is vital for their survival.
When the soil holds moisture but allows excess to flow away freely, you avoid the dreaded root rot and give your flowers the breathing room they need.
When Is the Best Time to Plant Flowers?
Planting in Spring vs. Fall
Spring is a popular time for planting flowers because the soil is workable, and temperatures are mild, giving roots a chance to establish before the heat of summer. Early spring is ideal for perennials and hardy annuals, as they’ll thrive with the upcoming growing season.
Fall, however, is perfect for planting spring-blooming bulbs like tulips and daffodils, as they need a period of cold to bloom beautifully. Fall planting also gives perennials a head start, allowing them to settle in before winter dormancy.
If you’re unsure which season suits your flowers best, consider their bloom times and hardiness zones. Always water newly planted flowers thoroughly, regardless of the season, to help them adapt quickly. Both seasons have their perks, so choose based on your flower’s needs and your local climate.
Understanding Frost Dates and Safe Planting Windows
Knowing your area’s last frost date in spring and first frost date in fall is crucial for successful flower planting. Planting too early in spring can expose tender flowers to frost damage, while planting too late in fall might leave them vulnerable to winter cold.
Check with local gardening resources or online tools to find these dates for your region. For most annuals, wait until after the danger of frost has passed in spring. In fall, aim to plant at least 6-8 weeks before the ground freezes to give roots time to establish.
If you’re unsure, opt for frost-hardy flowers like pansies or snapdragons, which can withstand cooler temperatures. Timing your planting right ensures your flowers grow strong and bloom beautifully, so don’t skip this step!
Tips for Planting During Summer Heat
Planting in summer can be challenging due to high temperatures, but with the right care, your flowers can still thrive. Water deeply before planting to moisten the soil, and choose a cloudy day or late afternoon to reduce stress on young plants.
Mulching around the base helps retain moisture and keeps roots cool. Consider heat-tolerant flowers like zinnias or marigolds, which handle summer heat well. Avoid planting during the hottest part of the day, as this can cause wilting. Instead, aim for early morning or evening when it’s cooler.
Keep a close eye on new plantings, ensuring they get consistent water but don’t sit in soggy soil. With a little extra attention, even summer planting can yield vibrant, healthy blooms. Just remember to stay patient and give your flowers the TLC they need to adjust to the heat.
Essential Tools You Need for Planting Flowers
Basic Hand Tools: Trowels, Spades, and Pruners
To plant flowers effectively, start with a trowel—a handheld tool perfect for digging small holes and loosening soil. Look for one with a comfortable grip and a sturdy, rust-resistant blade. A spade is your go-to for larger digging tasks, like turning over garden beds or planting bigger flowers.
Choose a spade with a sharp edge to cut through soil effortlessly. Don’t forget pruners, which are essential for trimming roots, deadheading, or shaping plants. Opt for bypass pruners for clean cuts on live stems.
Having these three tools ensures you’re prepared for every stage of planting, from breaking ground to maintaining healthy blooms. Keep them clean and sharp to make your work easier and your plants happier.
Gloves and Knee Pads for Comfort
Protecting yourself is just as important as caring for your flowers. A good pair of garden gloves shields your hands from thorns, blisters, and soil-borne bacteria. Choose gloves made of breathable, durable material like leather or synthetic blends for flexibility.
Knee pads or a kneeling mat are lifesavers when you’re planting or weeding for extended periods. They reduce strain on your joints and keep you comfortable, so you can focus on your garden instead of your aches. Investing in these essentials means you’ll enjoy gardening longer and avoid unnecessary discomfort.
Look for adjustable knee pads or a portable mat for easy storage and convenience.
Watering Equipment: Hoses, Cans, and Sprinklers
Proper watering is key to helping your flowers thrive, so you need the right equipment. A garden hose with an adjustable nozzle lets you control water flow, making it ideal for larger beds. For smaller areas or potted plants, a watering can provides gentle, precise hydration.
Choose a can with a long spout to reach under leaves without disturbing the soil. If you have a large garden, a sprinkler can save time by evenly watering a wide area. Consider a soaker hose for deep, efficient watering that minimizes evaporation.
The right tools ensure your flowers get the moisture they need without over- or under-watering, helping them grow strong and vibrant.
Watering and Feeding Your Flowers for Growth
How Often to Water New vs. Established Flowers
Getting the watering schedule right is crucial right after you plant your flowers. For new plantings, you’ll want to water deeply every day for the first week or two to help fragile roots settle into their new home. This consistent moisture prevents transplant shock and encourages rapid establishment.
Once you see new growth, you can slowly taper off to watering every few days. Established flowers are much tougher and generally prefer about an inch of water weekly, either from rainfall or your hose.
To check if they need a drink, simply stick your finger into the soil about two inches deep. If it feels dry, it’s time to water deeply; if it’s still damp, wait another day. Deep watering encourages roots to grow downward, making your plants more drought-resistant and vigorous over time.
Best Fertilizers for Blooming Plants
To keep your flowers producing vibrant blooms all season long, they need the right fuel. Most flowering plants thrive on a fertilizer high in phosphorus, which is the middle number in the N-P-K ratio found on packaging.
Look for a balanced liquid fertilizer or a formula specifically labeled for blooms to give your plants a quick boost. You can apply this every couple of weeks during the growing season to support continuous flowering.
For a slower, steady release of nutrients, try mixing some compost or organic bone meal into the soil before planting. This provides long-term nourishment and improves soil structure naturally.
Just remember to follow the package instructions carefully because over-fertilizing can actually burn roots and harm your plants more than help them. Feeding at the right times ensures your garden stays colorful.
Signs of Overwatering or Underwatering
Knowing what your plants are telling you can save them from disaster. Overwatering is a common mistake that causes leaves to turn yellow, feel mushy, or develop brown spots at the edges. The soil often smells swampy or sour, and roots may rot if left sitting in water too long.
On the other hand, underwatered plants will look wilted, with dry, crispy leaves curling inward or turning brown at the tips. The soil will pull away from the pot edges or feel completely dusty and dry. To fix either issue, adjust your watering habits immediately.
If overwatered, let the soil dry out completely before watering again; if underwatered, give the plant a slow, deep soak to rehydrate the roots fully. Learning to read these subtle signs helps you maintain a healthy balance.
Maintaining Your Flower Garden Long-Term
Deadheading Spent Flowers to Encourage New Blooms
Once your flowers are in the ground, keeping them blooming beautifully requires a little regular maintenance. Deadheading is one of the easiest ways to extend the flowering season. This simply means removing flowers that have faded or died.
By snipping these off, you prevent the plant from putting energy into producing seeds and instead redirect that energy back into creating new blooms. Use clean scissors or pruning shears to cut the stem just above the next set of healthy leaves or buds.
For plants with many tiny flowers, like petunias, you can even shear them back lightly with garden shears. This practice not only keeps your garden looking tidy but also encourages a lush, colorful display throughout the growing season.
Make it a habit to stroll through your garden weekly and remove spent flowers; your plants will reward you with a vibrant, long-lasting show that enhances your outdoor space.
Weeding and Mulching to Retain Moisture
To ensure your flowers thrive, you must manage the competition for resources. Weeds are notorious for stealing water and nutrients from your prized blooms, so regular weeding is essential. Pull weeds out by the root, ideally when the soil is moist, to prevent them from returning.
After weeding, applying a layer of organic mulch is a game-changer. A 2-3 inch layer of shredded bark, straw, or wood chips around your plants helps suppress weed growth and significantly retain soil moisture. This means you’ll spend less time watering and more time enjoying the view.
Mulch also regulates soil temperature, keeping roots cool during hot summer days. Just be sure to keep the mulch a few inches away from the plant stems to prevent rot.
This simple combination of diligent weeding and effective mulching creates a healthy environment where your flowers can flourish without fighting for survival.
Pest and Disease Prevention Tips
A healthy flower garden is your best defense against unwanted pests and diseases. Start by choosing plants that are suited to your local climate and soil conditions, as vigorous plants are naturally more resistant.
Keep an eye on your garden for early signs of trouble, such as holes in leaves or discolored spots. If you spot pests like aphids, a strong blast of water from the hose can often dislodge them without chemicals.
For more persistent issues, consider using insecticidal soap or introducing beneficial insects like ladybugs. Avoid overhead watering when possible, as wet foliage can encourage fungal diseases; instead, water at the base of the plants. practicing good sanitation, like clearing away fallen leaves and debris, also helps prevent disease overwintering.
By staying proactive and observant, you can keep your flower garden healthy and vibrant all season long, minimizing the need for harsh chemical interventions.
Frequently Asked Questions
What is the best time to plant flowers?
The best time to plant flowers is typically in the spring after the last frost for annuals or in the fall for perennials. This allows the plants to establish roots before extreme temperatures arrive. Always check the specific planting guidelines for your flower variety and local climate.
How do I prepare the soil for planting flowers?
Loosen the soil to a depth of 12-18 inches and remove any weeds or debris. Mix in organic matter like compost or aged manure to improve drainage and fertility. Ensure the soil is moist but not waterlogged before planting.
How deep should I plant flower seeds or seedlings?
Plant seeds at a depth of 2-3 times their diameter, or follow the seed packet instructions for specific varieties. For seedlings, dig a hole slightly larger than the root ball and place the plant at the same depth it was growing in its container. Gently firm the soil around the base to remove air pockets.
How often should I water newly planted flowers?
Water newly planted flowers daily for the first week to keep the soil evenly moist but not soggy. Afterward, reduce watering to 2-3 times a week, depending on rainfall and soil type. Always water at the base of the plant to avoid wetting the foliage, which can lead to disease.
Do flowers need sunlight?
Most flowers require at least 6 hours of direct sunlight daily, but some varieties thrive in partial or full shade. Check the plant tag or seed packet for sunlight requirements. Sunlight is crucial for photosynthesis and healthy blooms.
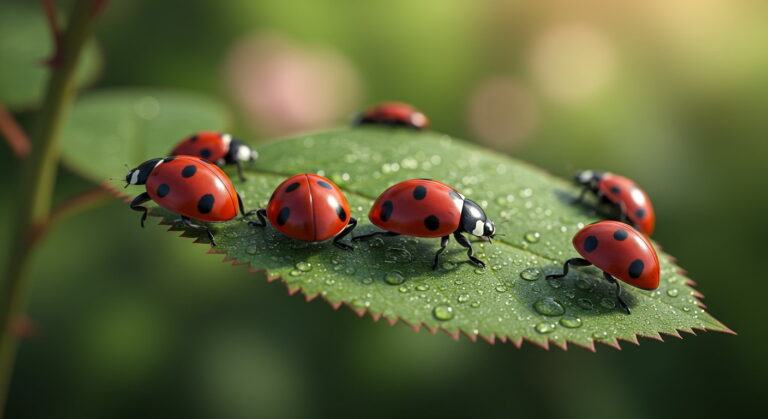
How can I protect my flowers from pests?
Encourage beneficial insects like ladybugs and lacewings, which prey on harmful pests. Use physical barriers like row covers or hand-pick pests like slugs and caterpillars. Avoid overwatering, as damp conditions can attract pests and diseases.
What is mulch, and should I use it for flowers?
Mulch is a layer of organic material, such as shredded bark or straw, spread over the soil to retain moisture and suppress weeds. Apply a 2-3 inch layer around flowers, keeping it away from the plant stems to prevent rot. Mulch also regulates soil temperature and adds nutrients as it decomposes.
Conclusion
Mulch helps retain moisture, and regular care ensures vibrant blooms. Whether you’re a beginner or experienced, gardening brings joy and beauty to your space. Grab your tools, pick your favorite flowers, and start creating your own colorful garden today!