How To Plant Ginger
Ready to grow your own ginger? It’s easier than you think! Let’s get your ginger garden started today—read on for the simple, foolproof method!
How to Plant Ginger: A Step-by-Step Guide
Selecting and Preparing the Ginger Rhizome
Start by choosing a fresh, plump ginger rhizome from the store or a nursery. Look for pieces with visible growth buds or “eyes,” similar to potato eyes, which indicate where new shoots will emerge. Avoid shriveled or moldy pieces.
Before planting, soak the rhizome in lukewarm water overnight to encourage hydration and awaken the buds. If it’s large, cut it into smaller sections, ensuring each piece has at least one bud. Let the cuts dry for a day to prevent rot.
This step is crucial because healthy, well-prepared rhizomes are the foundation for a thriving ginger plant. With the right start, your ginger will sprout faster and grow stronger.
Choosing the Right Pot or Garden Spot
Ginger thrives in warm, humid conditions, so pick a location with indirect sunlight or partial shade. If planting indoors, use a wide, shallow pot with drainage holes, as ginger has a shallow root system. Outdoors, choose a spot with loose, well-draining soil rich in organic matter.
Avoid heavy clay or waterlogged areas, as these can cause root rot. A temperature range of 70–85°F (21–29°C) is ideal. If you live in a cooler climate, consider growing ginger in containers so you can move it indoors during colder months.
Proper placement ensures your ginger stays healthy and productive throughout the growing season.
Planting Depth and Spacing Requirements
Plant the ginger rhizome pieces about 2–4 inches deep with the buds facing upward. Space them 6–8 inches apart to allow room for growth. If using a pot, a 12-inch diameter can accommodate 2–3 rhizomes.
Cover lightly with soil, but don’t pack it down too tightly—ginger needs aeration to grow well. Water thoroughly after planting, then keep the soil consistently moist but not soggy. Mulching with straw or leaves can help retain moisture and suppress weeds.
With proper depth and spacing, your ginger will have ample room to develop robust roots and produce a bountiful harvest in 8–10 months.
When Is the Best Time to Plant Ginger?
Planting by Season: Spring vs. Winter
The best time to plant ginger is in the spring, once the soil has warmed up and there’s no risk of frost. Ginger thrives in warm, humid conditions, so timing your planting with the arrival of spring gives the rhizomes the best chance to grow strong and healthy.
Aim to plant when temperatures consistently stay above 70°F (21°C), as ginger is sensitive to cold and won’t sprout in chilly soil. Avoid planting in winter, as the cold can rot the rhizomes or stunt growth.
If you’re in a cooler climate, consider starting your ginger indoors in early spring and transplanting it outside once the weather warms up. Plant in spring to ensure optimal growth, and choose a spot with partial shade to protect the young shoots from harsh sunlight.
Remember, ginger is a slow starter, so patience is key—don’t expect overnight results. By giving it a warm, cozy start, you’ll set the stage for a bountiful harvest in about 8-10 months.
Timing Your Planting for Specific Climates
Your local climate plays a huge role in when and how to plant ginger successfully. In tropical or subtropical regions, where temperatures stay warm year-round, you can plant ginger almost anytime, but late winter to early spring is still ideal for the best results.
For temperate climates, wait until the last frost has passed and the soil is workable, typically mid to late spring. In colder areas, you might need to grow ginger in containers indoors or in a greenhouse to mimic its preferred warm, humid environment.
Adapt to your climate by choosing a sheltered spot or using raised beds to improve drainage and warmth. If you’re in a dry climate, keep the soil consistently moist but not waterlogged, as ginger loves humidity.
No matter where you live, the key is to avoid cold snaps and ensure the ginger has a long, warm growing season. With the right timing and care, you’ll enjoy fresh, homegrown ginger in no time!
What Soil Conditions Does Ginger Need?
Ideal Soil pH and Texture
Ginger thrives best when you give it a rich, loose soil that mimics its tropical origins. You want to aim for a slightly acidic pH level between 5.5 and 6.5, which helps the plant absorb nutrients efficiently.
It’s really important to avoid heavy clay or compacted dirt, as these can suffocate the developing rhizomes and stunt growth. Instead, look for a loamy texture that feels crumbly and friable in your hands. This structure allows the roots to spread easily and ensures that excess water drains away quickly.
If you are planting directly in the ground, take some time to amend the earth with plenty of organic compost to improve its quality. Good soil is the absolute foundation of a healthy ginger crop, so don’t skip this step.
Getting the texture right from the start will save you a lot of trouble later on.
Creating a Well-Draining Soil Mix
If you are planting in containers or pots—which is often the easiest way to grow ginger—you need to create a custom mix that drains exceptionally well. Start with a high-quality potting soil and mix in generous amounts of perlite or coarse sand.
These amendments create air pockets in the dirt, preventing the roots from sitting in water and rotting. A great recipe to try is two parts potting soil to one part drainage material. This ensures that water flows freely while still holding enough moisture for the plant to drink.
Remember, ginger hates having “wet feet,” so drainage is non-negotiable. You can also add some aged manure or worm castings to this mix to give your ginger a nutritional boost. By taking control of your soil blend, you set the stage for robust, flavorful rhizomes.
Using Mulch to Retain Moisture
Once your ginger is planted, applying a thick layer of mulch is a game-changer for keeping the soil conditions consistent. Ginger loves consistently warm and moist soil, but it dries out quickly in the sun. Use straw, shredded leaves, or wood chips to cover the soil surface around your plants.
This organic blanket locks in moisture, meaning you won’t have to water as frequently, and it suppresses annoying weeds that compete for nutrients. As the mulch breaks down over time, it also adds valuable organic matter back into the earth, continuously feeding your ginger.
Aim for about 2 to 4 inches of mulch, but keep it slightly away from the stems to prevent rot. This simple step creates a stable micro-environment that mimics the forest floor, encouraging vigorous growth throughout the season.
How Much Sun and Water Does Ginger Require?
Optimal Light Conditions for Growth
Ginger loves bright, indirect sunlight to thrive, mimicking its natural tropical understory environment. When planting ginger outdoors, choose a spot that receives partial shade, especially during the hottest part of the day, as direct scorching sun can burn the leaves and stunt growth.
If you are growing ginger indoors, place your pot near a window where it gets plenty of light but is shielded from harsh rays. Ideally, aim for about 2-5 hours of filtered sunlight daily. If you notice the leaves turning yellow or brown, it might be getting too much sun.
On the flip side, if the stems look leggy or weak, the plant likely needs more light. Finding that sweet spot of bright but gentle light will encourage robust rhizome development and keep your plant healthy throughout the growing season.
Watering Schedule and Techniques
Consistent moisture is the secret sauce for growing juicy, flavorful ginger, but you don’t want to drown it. Water your ginger plant regularly to keep the soil consistently moist but not soggy.
During the active growing season in spring and summer, check the soil daily; if the top inch feels dry, give it a good drink. Mulching heavily around the base of the plant helps retain that precious moisture and regulates soil temperature.
When watering, aim to water at the soil level rather than splashing the leaves to prevent fungal issues. As the weather cools down in fall, you can gradually reduce watering.
Remember, ginger goes dormant in winter, so you’ll need to back off almost entirely until new shoots appear in the spring. This rhythm of hydration mimics the monsoon seasons of its native habitat.
Signs of Overwatering or Underwatering
Keeping an eye on your plant’s leaves is the easiest way to troubleshoot your watering routine. If your ginger is thirsty, you will see the leaves curl, crisp up, or turn yellow-brown at the tips. This is a clear signal it needs a drink immediately.
On the other hand, overwatering is a common mistake that leads to root rot. If the leaves turn yellow and mushy or the soil smells foul, you are likely watering too much or the drainage is poor.
To fix this, ensure your pot has drainage holes and cut back on watering frequency. Healthy ginger should have firm, green stems and vibrant foliage, so adjust your habits as soon as you spot these warning signs to keep your rhizomes safe underground.
How to Care for Growing Ginger Plants
Fertilizing for Healthy Rhizomes
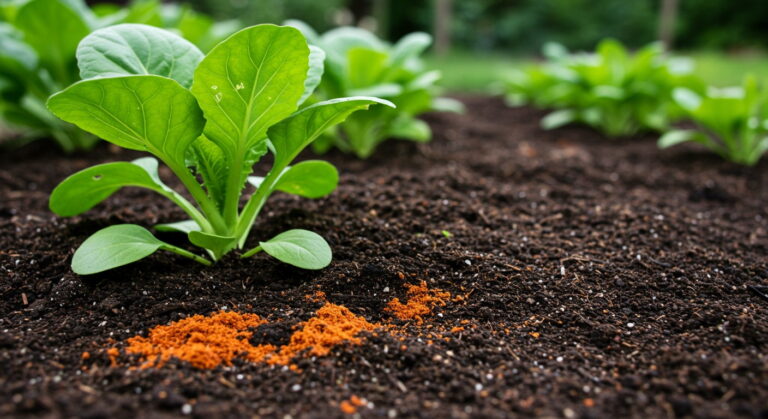
To keep your ginger thriving, feed it regularly with a balanced, slow-release fertilizer every 4-6 weeks during the growing season. Ginger loves nutrient-rich soil, so mixing in organic compost or aged manure before planting gives it a strong start.
As the plant grows, switch to a fertilizer higher in potassium to encourage larger, tastier rhizomes. Avoid over-fertilizing with nitrogen, as this promotes leafy growth at the expense of the roots. Water the plant thoroughly after applying fertilizer to help nutrients reach the root zone.
If growing ginger in containers, feed it more often since nutrients leach out faster in pots. A healthy ginger plant will reward you with plump, aromatic rhizomes ready for harvest in 8-10 months. Remember, consistency is key—don’t skip feedings, and your ginger will flourish.
Managing Pests and Diseases
Ginger is relatively hardy but can fall victim to pests like aphids, spider mites, and root-knot nematodes. Inspect your plants regularly, especially the undersides of leaves, and treat infestations early with insecticidal soap or neem oil to keep them under control.
Overwatering can lead to fungal diseases like root rot, so ensure well-draining soil and avoid waterlogging. If you notice yellowing leaves or stunted growth, check for signs of disease or pests immediately. Crop rotation and avoiding planting ginger in the same spot year after year can reduce nematode problems.
For organic gardens, introduce beneficial insects like ladybugs to prey on harmful pests. Keeping the area free of weeds also minimizes hiding spots for bugs. A little vigilance goes a long way in keeping your ginger patch healthy.
Pruning and Maintenance Tips
Ginger requires minimal pruning, but removing dead or yellowing leaves helps the plant focus energy on healthy growth. Use clean, sharp scissors to trim damaged foliage at the base. If the plant becomes too dense, thin out a few stems to improve air circulation and reduce disease risk.
Ginger enjoys humidity, so mist the leaves regularly if growing in a dry climate. Mulching around the base retains moisture and suppresses weeds—organic mulch like straw or shredded leaves works best. As the plant matures, you can gently check rhizome growth by brushing aside soil without disturbing the roots.
Stop watering a few weeks before harvest to toughen the skin for easier storage. With these simple steps, your ginger will stay vibrant and productive throughout the season.
How to Harvest Ginger Correctly
Signs Your Ginger Is Ready to Harvest
Knowing when your ginger is ready for harvest is exciting and easy to spot. The best time to check is usually after about 8 to 10 months of growth. Look for the yellowing leaves and drying stems, which indicate the plant has matured and entered dormancy.
Another clear sign is when the stems start to wither and fall over naturally. If you’re impatient and want ‘young ginger’ for milder flavor, you can harvest earlier, but the roots will be smaller. For the best yield, wait until the foliage has completely died back.
This ensures the rhizomes have developed their full flavor and potent aroma. Always check the soil moisture before digging; it should be slightly dry to make the process easier and prevent rotting.
Step-by-Step Harvesting Process
Harvesting ginger is a straightforward process that requires just a little bit of care. Start by loosening the soil around the base of the plant using a garden fork or your hands, being careful not to damage the rhizomes.
Once the soil is loose, gently lift the entire plant out of the ground. Shake off the excess dirt and rinse the roots with water to reveal the beautiful, golden-hued ginger.
Use sharp shears or a knife to cut off the rhizomes, leaving a few small pieces attached if you plan to replant them next season. This ensures a continuous supply of fresh ginger. Discard any shriveled or rotten pieces immediately to keep your harvest healthy and fresh.
Storing Fresh Ginger After Harvest
Proper storage is key to keeping your harvested ginger fresh and flavorful for months. First, let the rhizomes dry in a cool, shady spot for a few days to cure any cuts. Avoid direct sunlight, as it can scorch the skin.
Once dried, store unpeeled ginger in a paper bag in the refrigerator’s crisper drawer; this usually keeps it fresh for up to three weeks. For longer storage, you can freeze the ginger.
Simply peel, grate, or chop it into small portions, then place them in an airtight container or freezer bag. Frozen ginger lasts for months and is perfect for quick cooking. Another great option is to submerge fresh roots in vodka or sherry, preserving them for several months in the fridge.
How to Plant Ginger in Containers vs. In-Ground
Pros and Cons of Container Planting
Planting ginger in containers is a great option if you’re short on space or live in a cooler climate. Pots allow you to move the plant indoors during winter, ensuring it stays warm.
Containers also give you control over soil quality and drainage, which is crucial since ginger hates waterlogged roots. However, pots can dry out faster, so you’ll need to water more frequently. Plus, large containers can be heavy and harder to manage.
On the upside, harvesting is easier—just tip the pot over to dig up the rhizomes. If you choose this method, pick a wide, shallow pot (at least 12 inches deep) and fill it with well-draining soil. Container planting is ideal for beginners who want flexibility and easier maintenance.
Tips for Successful In-Ground Cultivation
Growing ginger in the ground works best if you have a warm, frost-free climate and well-draining soil. Start by choosing a shady spot with partial sunlight, as ginger thrives in indirect light. Loosen the soil and mix in organic compost to boost fertility.
Plant ginger rhizomes about 2 inches deep and 8 inches apart, with the buds facing up. Mulch heavily to retain moisture and suppress weeds. Consistent watering is key—keep the soil damp but not soggy. In-ground plants often produce larger rhizomes, but they’re more vulnerable to pests and weather changes.
If your soil is heavy or clay-like, consider raised beds to improve drainage. With the right conditions, ginger can spread easily in the ground, giving you a bountiful harvest.
Transplanting Ginger Between Containers and Soil
Transplanting ginger between containers and soil requires care to avoid shocking the plant. If moving from a pot to the ground, gradually acclimate the plant by placing it outside for longer periods over a week.
Dig a hole twice as wide as the root ball and gently loosen the roots before planting. When moving from soil to a container, trim back any damaged roots and replant in fresh, nutrient-rich soil. Timing matters—transplant in spring when the plant is actively growing.
Avoid disturbing the rhizomes too much, as this can slow growth. Whether transferring to a pot or the ground, water thoroughly after transplanting to help settle the roots. With patience, your ginger will adjust and continue thriving in its new home.
Frequently Asked Questions
How do I plant ginger?
Start by cutting a fresh ginger rhizome into pieces, each with at least one ‘eye’ or growth bud. Plant the pieces 2-4 inches deep in well-draining, rich soil with the eyes facing upward. Keep the soil moist but not waterlogged, and place the pot or garden bed in partial shade for best results.
When is the best time to plant ginger?
Ginger thrives in warm climates, so plant it in late winter or early spring after the last frost. In cooler regions, start ginger indoors about 8-10 weeks before the last frost date. Ensure the soil temperature is consistently above 75°F (24°C) for optimal growth.
What kind of soil does ginger need?
Ginger prefers loose, well-draining soil rich in organic matter, such as compost or aged manure. Avoid heavy clay or waterlogged soils, which can rot the rhizomes. A slightly acidic to neutral pH (6.0-7.0) is ideal.
How much sunlight does ginger need?
Ginger grows best in partial shade, especially in hot climates where full sun can scorch the leaves. Aim for 2-5 hours of indirect or filtered sunlight daily. In cooler climates, ginger can tolerate more sun but still benefits from some afternoon shade.
How often should I water ginger?
Keep the soil consistently moist but not soggy, as ginger requires regular watering to thrive. Water deeply once or twice a week, depending on the weather and soil drainage. Reduce watering in colder months to prevent root rot.
How long does it take for ginger to grow?
Ginger typically takes 8-10 months to reach maturity for harvest. You can harvest small pieces earlier as ‘green ginger,’ but full-sized rhizomes develop after the leaves yellow and die back. For quicker results, start with pre-sprouted ginger pieces.
Can I grow ginger in a pot?
Yes, ginger grows well in pots, making it suitable for small spaces or indoor gardening. Use a wide, shallow container at least 12 inches deep with drainage holes. Fill it with a high-quality potting mix and ensure the pot receives adequate warmth and indirect light.
How do I harvest ginger?
Harvest ginger by gently digging up the rhizomes once the plant’s foliage has yellowed and died back. Pull the entire plant or cut off small sections as needed, leaving the rest to continue growing. Rinse the rhizomes and let them dry before storing or using them.
Conclusion
Keep the soil moist but not waterlogged, and in 8-10 months, harvest fresh ginger. Remember to space rhizomes properly and add organic matter for best results. Start your ginger garden today and enjoy the satisfaction of growing your own flavorful, versatile spice right at home!