How To Plant Tulip Bulbs
Ready to bring vibrant color to your garden? Whether you’re a seasoned gardener or a beginner, this quick and easy guide will have your tulips blooming beautifully in no time. Let’s get started
How to Plant Tulip Bulbs in 7 Simple Steps
Step 1: Choose the Perfect Location for Planting
Start by picking a sunny spot in your garden where tulips can thrive. These vibrant flowers love plenty of sunlight, so aim for a location that gets at least six hours of direct sun daily. Good drainage is also crucial because soggy soil can cause bulbs to rot.
Avoid low-lying areas where water tends to collect after heavy rains. If you’re planting in a bed with other plants, ensure the tulips won’t be shaded out by larger perennials later in the season. A well-chosen site sets the foundation for healthy, blooming tulips.
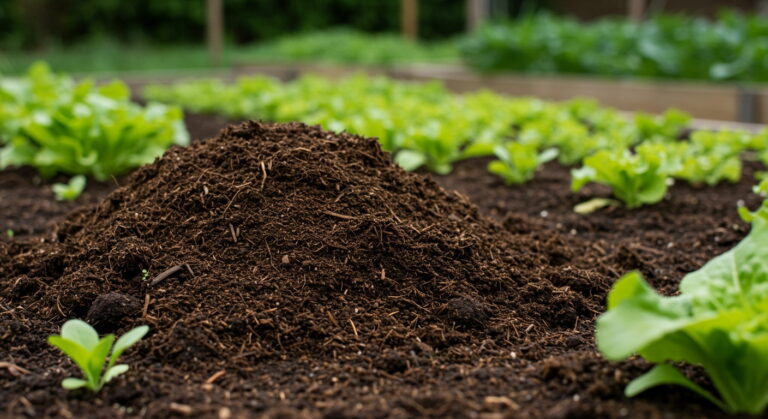
Step 2: Prepare the Soil for Optimal Growth
Tulips prefer loose, well-draining soil to develop strong roots. Begin by clearing the area of weeds, rocks, and debris. Loosen the soil to a depth of about 12 inches using a garden fork or tiller. Mixing in organic matter like compost or aged manure improves drainage and adds nutrients.
Avoid heavy clay soils unless amended with sand or organic material. Well-prepared soil ensures bulbs can easily establish themselves before winter sets in. This extra effort now pays off with a stunning display of flowers in spring.
Step 3: Dig the Planting Holes to the Correct Depth
Digging holes to the right depth is essential for tulip success. As a general rule, plant bulbs three times as deep as their height. For most standard tulip bulbs, this means digging about 6 to 8 inches deep. Space holes 3 to 4 inches apart to allow room for growth.
You can use a bulb planter, trowel, or even a garden spade for larger areas. Consistent depth protects bulbs from temperature fluctuations and pests, ensuring they stay snug underground until it’s time to sprout.
Step 4: Position the Bulb Correctly
Place each bulb in its hole with the pointed side facing upward. The pointed end is where the stem and leaves will emerge, while the flatter base is where roots develop. If you’re unsure which side is up, planting sideways often works too—the bulb will naturally correct itself.
Avoid pressing the bulb too hard into the soil, which can compact the ground. Proper positioning ensures the tulip grows straight and healthy, making the most of its stored energy for a beautiful bloom.
Step 5: Backfill and Water the Site
Gently fill the holes with soil, covering the bulbs completely without leaving air pockets. Lightly tamp the soil to secure the bulbs but avoid compacting it too much. Water the area thoroughly right after planting to settle the soil and kickstart root growth.
This step is especially important if the fall weather has been dry. A good watering ensures the bulbs have the moisture they need to establish before winter. Mulching the area can also help retain moisture and protect bulbs from extreme cold.
When Is the Best Time to Plant Tulip Bulbs?
Fall Planting: Why Timing Is Critical for Blooms
Planting tulip bulbs in the fall is essential because they need a period of cold dormancy to bloom beautifully in spring. Aim to plant them 6–8 weeks before the ground freezes, typically when soil temperatures drop below 60°F (15°C). This timing allows roots to establish before winter sets in.
Choose a sunny spot with well-draining soil to prevent rot. Dig a hole about three times the bulb’s height, place the bulb pointy side up, and cover it with soil. Water lightly to settle the soil, but avoid soaking it. Mulching can help protect the bulbs from harsh winter temperatures.
By planting in the fall, you’re giving your tulips the best chance to thrive when spring arrives.
Can You Plant Tulip Bulbs in the Spring?
While it’s possible to plant tulip bulbs in spring, it’s not ideal because they may not bloom that year. Tulips need 12–16 weeks of cold exposure to trigger flowering, which they miss if planted in spring.
If you have leftover bulbs, you can still try planting them as soon as the ground is workable. Choose a location with full sun and good drainage, and plant the bulbs at the same depth as in fall. Water them gently after planting.
Though they might not bloom immediately, they may flower the following year. For the best results, always prioritize fall planting to ensure vibrant, healthy blooms.
Regional Differences: When to Plant Based on Your Hardiness Zone
Your planting timeline depends on your hardiness zone. In colder zones (3–5), plant tulips in late September or early October. In milder zones (6–8), aim for November or December. For warmer zones (9+), chill bulbs in the fridge for 10–12 weeks before planting.
Always check soil temperatures—aim for around 40–50°F (4–10°C). Adjust your schedule if the weather is unusually warm or cold. By tailoring your planting time to your zone, you’ll help your tulips develop strong roots and produce stunning blooms.
Don’t forget to mark your planting spots so you don’t disturb them later!
Choosing the Right Tulip Varieties for Your Garden
Darwin Hybrid Tulips: The Classic Choice
If you’re looking for reliability and stunning color, Darwin Hybrid Tulips are the way to go. These tulips are famous for their large, pyramid-shaped blooms and strong stems that hold up well against wind and rain.
They’re perfect for creating a bold display in your garden, and they come in vibrant shades like red, yellow, and pink. When planting, place these bulbs about 6-8 inches deep in well-draining soil to encourage strong root growth.
They thrive in full sun and will return year after year with minimal effort. Just make sure to let the foliage die back naturally after blooming to fuel the next season’s growth. These tulips are ideal for borders or cutting gardens, adding a classic touch to any landscape.
Species Tulips: Perennial and Low Maintenance
For a more natural, wildflower look, Species Tulips are an excellent choice. Unlike their hybrid cousins, these smaller tulips are perennial and will multiply over time, filling your garden with delicate blooms. They’re also more resistant to pests and diseases, making them a low-maintenance option for beginners.
Plant these bulbs in clusters or rock gardens for a charming, informal effect. They prefer well-drained soil and a sunny spot but can tolerate partial shade. Their shorter stems make them great for edging or planting in containers.
Since they naturalize easily, you won’t need to replant them every year—just sit back and enjoy their return each spring. Species tulips are perfect for adding a touch of whimsy to your garden with minimal effort.
Parrot and Double Tulips: For Unique Texture and Shape
If you want your garden to stand out, Parrot and Double Tulips offer extraordinary texture and form. Parrot tulips have ruffled, feather-like petals that resemble a bird’s plumage, while double tulips feature lush, peony-like blooms. These varieties are sure to turn heads with their bold colors and intricate shapes.
Plant them in a sheltered spot to protect their large blooms from strong winds. They’re perfect for focal points or mixed borders where their unique beauty can shine. Like other tulips, they need full sun and well-draining soil to thrive.
These tulips are also great for cut flowers, adding a dramatic flair to indoor arrangements. With their eye-catching appeal, Parrot and Double tulips are a must-have for gardeners looking to add a touch of elegance and flair to their outdoor space.
Essential Tips for Planting Tulips in Containers
Selecting the Right Pot and Soil Mix
Choosing the right container is your first step toward a stunning spring display. You want a pot that is at least 12 inches deep to give the bulbs plenty of room to root, but make sure it has drainage holes to prevent rot.
Tulips hate sitting in soggy soil, so good drainage is non-negotiable. For the soil, avoid using heavy garden dirt which can compact in pots. Instead, opt for a high-quality, loose potting mix that drains well.
You can mix in some sand or perlite to improve aeration if the mix feels too dense. This ensures the bulbs stay dry during winter wet spells and encourages healthy root growth.
When filling your pot, leave about an inch of space below the rim to make watering easier without overflow.
Layering Bulbs for a ‘Lasagna’ Flower Display
To maximize your container’s impact, try the lasagna planting method for a continuous show of color. Start by adding a layer of soil to the bottom of your pot, then place your largest tulip bulbs with the pointed tips facing upward.
Cover them completely with soil, then add a layer of smaller bulbs like daffodils or crocuses on top. You can even add a third layer of early bloomers like snowdrops. This technique works because different bulbs root at different depths and bloom at different times.
As a result, you get waves of flowers from early spring to late spring, all from the same pot. Just ensure no bulbs are touching each other, and cover the final layer with soil.
Protecting Potted Bulbs from Winter Frost
Potted bulbs are much more vulnerable to freezing temperatures than those planted in the ground because the soil in containers gets colder. To protect your investment, move the pots to a sheltered spot like an unheated garage or shed once the ground freezes.
This keeps them cold enough for dormancy but safe from deep freeze damage. If you must leave them outside, wrap the pot in bubble wrap or burlap for insulation against frost. You should also keep the soil slightly moist throughout winter, as completely dry roots can die off.
In spring, once the danger of hard frost has passed, move your containers back into the sunlight and watch them burst into bloom.
How to Care for Tulips After Planting
Watering Requirements During Fall and Winter
Once you’ve planted your tulip bulbs, give them a good drink to help them settle into the soil. This initial watering is crucial because it activates root growth before the ground freezes.
After that, you generally don’t need to water them during winter because tulips go dormant and prefer dry, cold conditions. Overwatering can actually cause the bulbs to rot, so it’s best to let natural rainfall do the work.
If you live in an area with a dry fall, you might water once more to keep the soil slightly moist, but stop once the frost arrives. Remember, tulips are quite hardy and don’t need much attention while they’re sleeping underground.
Just make sure the soil drains well, and they’ll be ready to pop up when spring arrives.
Applying Mulch for Insulation and Weed Control
After planting and watering, add a layer of mulch like straw, shredded leaves, or wood chips over the area. This helps insulate the soil and keeps temperatures stable, protecting your bulbs from harsh freeze-thaw cycles that can push them out of the ground.
Mulch also prevents weeds from taking over, so your tulips don’t have to compete for nutrients. Aim for a 2-3 inch layer, but avoid piling it too thick—bulbs need some airflow.
In early spring, you can gently remove or thin the mulch to make it easier for the sprouts to push through. This simple step saves you time weeding later and ensures your tulips stay cozy all winter long.
Plus, it keeps the soil moist during dry spells, giving your bulbs the best start.
What to Do When Tulips Begin to Sprout
When you see green shoots poking through the soil in spring, it’s time to give your tulips some attention. Start by watering lightly if the weather is dry, but don’t overdo it—tulips dislike soggy soil.
If you applied heavy mulch, gently move it aside to help the sprouts grow without obstruction. You can also sprinkle a balanced fertilizer around the plants to give them a nutrient boost for bigger, brighter blooms.
Keep an eye out for pests like aphids or squirrels that might nibble on the new growth. As the stems grow taller, avoid trampling them, and consider staking if they’re in a windy spot.
With a little care now, your tulips will reward you with a stunning display that lasts for weeks.
Post-Bloom Care: Ensuring Tulips Return Next Year
Deadheading Spent Flowers to Redirect Energy
Once your tulips have finished blooming, it’s time to remove the faded flowers to help the plant focus its energy on the bulb rather than seed production. Snip off the flower head just below the bloom, taking care not to cut the leaves or stem.
This simple step, known as deadheading, prevents the plant from wasting energy on seeds and instead directs it back into the bulb for next year’s growth. Use clean garden shears or your fingers to pinch off the wilted flowers.
By doing this promptly after the petals drop, you encourage the bulb to store more nutrients, which is essential for a vibrant display next spring. Just remember to leave the foliage intact, as it plays a crucial role in this process.
Deadheading is a quick and easy task that makes a big difference in the longevity and health of your tulip beds.
Letting Foliage Die Back Naturally
After deadheading, resist the urge to tidy up by cutting back the leaves. The foliage is still hard at work, absorbing sunlight to replenish the bulb for the next growing season. Allow the leaves to yellow and wither naturally, as this indicates the bulb has gathered enough energy.
Prematurely removing the leaves can weaken the bulb, leading to poor or no blooms the following year. If the fading leaves look unsightly, consider planting companion plants like daylilies or hostas to camouflage them. Gently tie the leaves together with soft twine if needed, but avoid tight bindings.
Patience is key here—wait until the leaves turn completely brown and pull away easily before removing them. This hands-off approach ensures your tulips have the resources they need to return beautifully year after year.
Fertilizing for Next Year’s Blooms
Giving your tulips a nutrient boost after flowering can set the stage for a spectacular show next spring. Apply a balanced, slow-release bulb fertilizer or a compost mix around the base of the plants once the blooms fade.
This provides essential nutrients like phosphorus and potassium, which support root development and future flower production. Lightly work the fertilizer into the soil surface and water well to help it reach the bulbs. Avoid high-nitrogen fertilizers, as they promote leafy growth at the expense of flowers.
A fall application of fertilizer can also be beneficial, as bulbs start developing roots before winter. Remember to follow package instructions for the right amount—over-fertilizing can harm the bulbs. With the right timing and care, your tulips will thank you with vibrant, healthy blooms when the season returns.
Common Problems When Planting Tulip Bulbs
Watering Requirements During Fall and Winter
Once you’ve planted your tulip bulbs, give them a good drink to help them settle into the soil. This initial watering is crucial because it activates root growth before the ground freezes.
After that, you generally don’t need to water them during winter because tulips go dormant and prefer dry, cold conditions. Overwatering can actually cause the bulbs to rot, so it’s best to let natural rainfall do the work.
If you live in an area with a dry fall, you might water once more to keep the soil slightly moist, but stop once the frost arrives. Remember, tulips are quite hardy and don’t need much attention while they’re sleeping underground.
Just make sure the soil drains well, and they’ll be ready to pop up when spring arrives.
Applying Mulch for Insulation and Weed Control
After planting and watering, add a layer of mulch like straw, shredded leaves, or wood chips over the area. This helps insulate the soil and keeps temperatures stable, protecting your bulbs from harsh freeze-thaw cycles that can push them out of the ground.
Mulch also prevents weeds from taking over, so your tulips don’t have to compete for nutrients. Aim for a 2-3 inch layer, but avoid piling it too thick—bulbs need some airflow.
In early spring, you can gently remove or thin the mulch to make it easier for the sprouts to push through. This simple step saves you time weeding later and ensures your tulips stay cozy all winter long.
Plus, it keeps the soil moist during dry spells, giving your bulbs the best start.
What to Do When Tulips Begin to Sprout
When you see green shoots poking through the soil in spring, it’s time to give your tulips some attention. Start by watering lightly if the weather is dry, but don’t overdo it—tulips dislike soggy soil.
If you applied heavy mulch, gently move it aside to help the sprouts grow without obstruction. You can also sprinkle a balanced fertilizer around the plants to give them a nutrient boost for bigger, brighter blooms.
Keep an eye out for pests like aphids or squirrels that might nibble on the new growth. As the stems grow taller, avoid trampling them, and consider staking if they’re in a windy spot.
With a little care now, your tulips will reward you with a stunning display that lasts for weeks.
Frequently Asked Questions
When is the best time to plant tulip bulbs?
The best time to plant tulip bulbs is in the fall, about 6-8 weeks before the ground freezes, when soil temperatures are below 60°F (15°C). This allows the bulbs to establish roots before winter dormancy. In most regions, this means planting between September and November.
How deep should I plant tulip bulbs?
Tulip bulbs should be planted about 6-8 inches deep, measured from the base of the bulb to the soil surface. Dig holes three times the height of the bulb for proper planting depth. Space bulbs 4-6 inches apart to allow room for growth.
Do tulip bulbs need full sun or shade?
Tulips thrive in full sun to partial shade, requiring at least 6 hours of direct sunlight daily. They prefer well-draining soil to prevent rot. Avoid planting in areas with heavy shade or waterlogged soil.
Should I soak tulip bulbs before planting?
No, tulip bulbs should not be soaked before planting as they can rot. Healthy bulbs contain all the moisture they need to grow. Soaking them can also invite fungal diseases.
How do I protect tulip bulbs from pests?
To deter pests like squirrels or rodents, place a wire mesh or chicken wire over the planting area. You can also sprinkle crushed eggshells or use natural repellents like cayenne pepper around the bulbs. Avoid using mulch that pests can easily dig through.
Can I plant tulip bulbs in containers?
Yes, tulip bulbs can be planted in containers as long as the pot has drainage holes. Use a well-draining potting mix and follow the same depth and spacing guidelines as ground planting. In colder climates, protect the container from freezing by moving it to a garage or wrapping it.
Do tulip bulbs need to be fertilized when planting?
Tulip bulbs benefit from a slow-release fertilizer or bone meal mixed into the soil at planting time. Avoid placing fertilizer directly on the bulbs, as it can burn them. Re-fertilize in early spring when shoots emerge for stronger blooms.
What should I do with tulip bulbs after they bloom?
After blooming, deadhead the flowers but leave the foliage to die back naturally. This allows the bulbs to store energy for next year’s blooms. Once the leaves turn yellow, you can cut them back and lift the bulbs for storage or leave them in the ground.
Conclusion
Mulch for protection and ensure cold dormancy. With proper care, you’ll enjoy vibrant blooms. It’s simple, satisfying, and guarantees a stunning display next season. Happy gardening