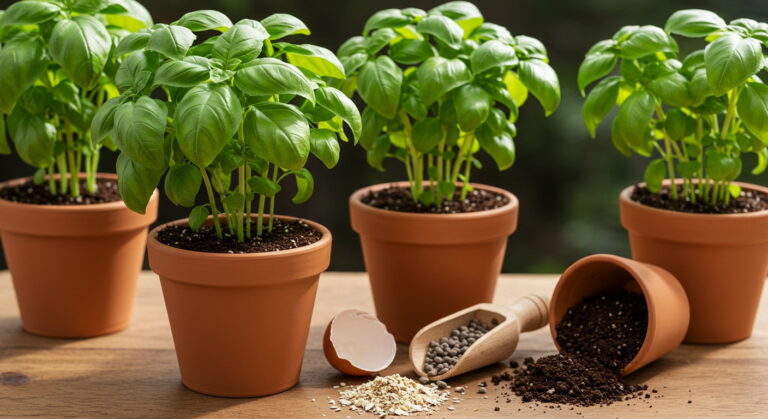
Outdoor Raised Garden Boxes
Tired of bending over or dealing with poor soil? Outdoor raised garden boxes are the smart, simple solution for growing lush vegetables, herbs, and flowers with less effort. They improve drainage, extend growing seasons, and give you full control over soil quality. In this guide, we’ll show you the best materials, sizes, and tips to build or buy the perfect raised garden box for your outdoor space.
The Benefits of Using Outdoor Raised Garden Boxes
Superior Soil Control and Quality
One of the primary advantages of outdoor raised garden boxes is the complete authority you gain over your growing medium. Instead of battling compacted native clay or sandy soil, you can fill your beds with a custom nutrient-rich blend tailored specifically to your plants’ needs.
This control allows you to optimize pH levels and drainage immediately, bypassing years of soil amendment required for traditional gardens. Furthermore, raised beds minimize the risk of soil compaction because you never walk on the planting area, keeping the soil loose and fluffy for delicate roots.
By starting with high-quality compost and organic matter, you ensure your vegetables and flowers have the best possible foundation.
This isolation also helps prevent common soil-borne diseases and weeds from infiltrating your garden, giving your crops a significant head start and leading to a much more bountiful harvest season after season.
Enhanced Drainage and Root Aeration
Elevating your garden provides a natural solution to poor drainage issues that often plague traditional in-ground plots. Because raised beds are elevated, excess water drains away much more efficiently, preventing root rot and fungal diseases caused by waterlogged soil.
This elevation allows the soil to warm up faster in the spring, extending your growing season and giving seeds a vigorous start. The loose, friable soil used in these boxes promotes exceptional root aeration, allowing plant roots to spread freely and access oxygen more easily than in compacted earth.
When roots can breathe and expand without hitting hardpan, plants grow stronger and produce higher yields. Additionally, during heavy rainfall, raised beds act as a buffer, protecting your precious crops from standing water.
This superior environment ensures that even during wet seasons, your garden remains healthy, productive, and resilient against weather-related stress.
Reduced Back Strain and Easier Access
Gardening should be an enjoyable hobby, not a source of physical pain, and raised boxes are specifically designed to reduce back strain and physical fatigue.
By elevating the planting surface to a comfortable height, you can tend to your plants without constant bending, kneeling, or stooping, making it accessible for gardeners with mobility issues. This ergonomic advantage allows you to maintain your garden for longer periods without the discomfort associated with ground-level planting.
The defined borders also provide a clear barrier, helping you manage pathways and organize crops efficiently, which reduces the need to step into growing areas. Furthermore, the height makes it easier to spot pests, harvest ripe vegetables, and weed effectively.
Whether you are an experienced gardener aging in place or someone looking to minimize physical exertion, these boxes make the cultivation process significantly more comfortable and sustainable for everyone involved in the project.
Choosing the Best Materials for Durability and Safety
Natural Wood Options: Cedar vs. Redwood
When selecting natural wood for your garden, cedar and redwood are top contenders for longevity and aesthetics. Cedar is naturally rot-resistant and insect-repellent, often lasting 10-15 years without treatment. It is lightweight and affordable, making it a popular choice for DIYers.
Redwood offers similar benefits but tends to be slightly more durable and richer in color, though it comes at a higher price point. Both woods contain natural oils that protect against decay, ensuring your soil remains safe for growing vegetables.
To maximize their lifespan, apply a non-toxic, raw linseed oil finish annually. Choose cedar for budget-friendly projects or redwood if you prioritize a premium look and extended durability. Avoid using pine or spruce unless heavily treated, as they will rot quickly in moist soil conditions.
Composite and Recycled Plastic Beds
For a low-maintenance and long-lasting solution, composite and recycled plastic lumber are excellent alternatives to wood. These materials are typically made from a blend of recycled plastic and wood fibers, offering the look of timber without the susceptibility to rot or splintering.
They are highly durable, often lasting 25 years or more, and resist warping even in extreme weather conditions. Because they do not leach chemicals into the soil, they are completely safe for organic gardening. Composite beds never need painting or staining, saving you time and effort over the years.
While the upfront cost can be higher than natural wood, the longevity and lack of maintenance make them a cost-effective investment for serious gardeners looking for a permanent fixture in their landscape.
Metal and Galvanized Steel Solutions
Metal raised beds, particularly those made from galvanized steel or corrugated iron, provide a modern, industrial aesthetic and exceptional durability. These materials are impervious to rot, insects, and warping, often lasting decades.
Galvanized steel is coated with zinc to prevent rust, ensuring the beds remain structurally sound through harsh winters and wet seasons. One major advantage of metal is its heat conductivity; metal beds warm soil faster in spring, allowing for earlier planting.
However, this same trait can overheat roots in summer, so positioning them in partial shade or using insulating liners is beneficial. Ensure the metal is food-grade and free from lead paint to maintain soil safety.
These beds are lightweight yet sturdy, making them ideal for renters or those seeking a sleek, contemporary garden design that withstands the elements.
Understanding Treated Lumber Safety
Pressure-treated lumber has evolved, and modern options are generally considered safe for raised beds, provided you choose the right type. Older treatments used arsenic, which is toxic, but most modern pressure-treated wood uses alkaline copper quaternary (ACQ) or copper azole.
These copper-based fungicides are effective at preventing rot and termite damage without the high toxicity of previous chemicals. To ensure maximum safety, look for wood labeled for ground contact and avoid using older, reclaimed treated lumber of unknown origin.
Some gardeners prefer to line the interior sides with heavy-duty plastic to create a physical barrier between the wood and soil.
While the risk of chemical leaching is low with modern treatments, taking this extra precaution can provide peace of mind for those growing edible crops in their raised garden boxes.
Optimal Sizing, Depth, and Placement Strategies
Determining the Ideal Depth for Root Systems
To ensure healthy plant growth, you must match the box depth to the crops you intend to grow. Shallow-rooted vegetables like lettuce, spinach, and radishes thrive in beds as shallow as 6 to 8 inches.
However, for deep-rooted staples such as carrots, tomatoes, and potatoes, you should aim for a depth of at least 12 to 18 inches. Deeper beds retain moisture better and reduce the frequency of watering, which is crucial during hot summer months.
If drainage is poor in your native soil, consider going even deeper to prevent root rot. Always remember that the soil will settle over time, so filling the bed slightly higher than the rim initially provides a buffer. Prioritize depth for heavy feeders to maximize your harvest potential.
Width and Accessibility Standards
The width of your raised garden box is critical for comfortable maintenance without stepping into the soil. A standard width of 4 feet is ideal because it allows you to reach the center from either side.
Avoid exceeding 4 feet in width if the bed is accessible from both sides, as stretching too far can compact the soil and damage plants.
If you are placing the bed against a wall or fence, reduce the width to 2 to 3 feet so you can easily reach the back. Accessible design reduces strain on your back and knees, making gardening a more enjoyable activity.
Ensure the construction is sturdy enough to hold the weight of the wet soil without bowing outward. Proper width ensures every inch of your garden is easily reachable for planting and harvesting.
Sunlight Requirements and Microclimates
Selecting the right location involves analyzing sunlight exposure and local weather patterns. Most vegetable crops require a minimum of 6 to 8 hours of direct sunlight daily to produce a bountiful harvest. Track sun patterns throughout the day to identify shady spots caused by buildings or trees.
In hotter climates, afternoon shade can actually benefit sensitive plants, preventing them from scorching. Be mindful of microclimates, such as areas near concrete walls that radiate heat or windy corners that dry out soil quickly.
Orientation matters for growth; aligning beds north to south often ensures the most even light distribution across the plants. By carefully observing your yard’s specific conditions, you can position your boxes to optimize photosynthesis and protect your plants from harsh environmental stressors.
Planning for Proper Spacing and Walkways
Efficient garden layout requires adequate spacing between boxes to facilitate movement and maintenance. You should leave at least 18 to 24 inches of clearance between beds for walkways, though 3 feet is preferable if you plan to use a wheelbarrow or garden cart.
Wide pathways prevent overcrowding and allow air to circulate freely, which helps minimize fungal diseases on your plants. Grass or mulch between the boxes keeps mud at bay during rainy weather and provides a clean working surface.
When planning your layout, consider the mature size of your plants to ensure they do not shade neighboring beds. Strategic spacing simplifies logistics by giving you room to kneel, crouch, or move tools comfortably. Proper planning now saves significant effort and frustration later in the growing season.
DIY Construction vs. Buying Pre-Fabricated Kits
Pros and Cons of Building Your Own
Building your own raised garden beds offers maximum customization regarding size, shape, and material choice, allowing you to fit specific garden layouts perfectly. It is often more cost-effective if you already own basic tools, as you can source lumber directly from a hardware store.
However, this route requires significant time and physical labor, including cutting wood and ensuring corners are square. You must also consider the longevity of materials, as untreated wood may rot quickly, while treated options require careful selection to avoid chemicals leaching into the soil.
Weighing your DIY skills against the desire for a quick setup is crucial before starting this project.
Essential Tools and Hardware Needed
To successfully construct DIY raised beds, you need a few power tools and fasteners. A circular saw or miter saw is essential for making straight, accurate cuts in your lumber. You will also need a power drill and driver bits to assemble the frame efficiently.
For hardware, choose exterior-grade screws like galvanized or stainless steel to prevent rust over time. A tape measure, speed square, and level are vital for ensuring the box is square and structurally sound.
Don’t forget safety gear, including gloves and safety glasses, to protect yourself during the cutting and assembly process. Having these tools ready ensures a smooth build.
Evaluating Pre-Made Kit Options
Pre-fabricated kits provide a convenient and time-saving solution for gardeners who lack tools or carpentry skills. These kits often come with pre-cut and pre-drilled pieces, significantly reducing assembly time. When evaluating options, look for durable materials like cedar, metal, or recycled plastic that resist rot and pests.
Check the depth of the kit to ensure it provides adequate root space for your desired vegetables. Additionally, consider the kit’s modularity; some systems allow you to stack or connect units easily.
While generally more expensive upfront, the ease of setup and uniform appearance make kits an excellent choice for immediate gardening results.
Step-by-Step Assembly Tips
Whether building from scratch or using a kit, start by leveling the ground thoroughly to prevent water runoff issues. If assembling a kit, lay out all parts and verify you have the necessary hardware before beginning.
For DIY builds, pre-drill holes to avoid splitting the wood and use corner brackets for extra stability. Assemble the frame upside down on a flat surface to ensure it is square, then flip it into place. Once positioned, secure the bed with stakes if it is tall.
Finally, line the bottom with hardware cloth to deter burrowing pests before adding your soil and compost. This preparation ensures a long-lasting garden bed.
Soil Composition and Filling Your Garden Beds
The Perfect Raised Bed Soil Mix Recipe
For thriving outdoor raised garden boxes, avoid using native garden soil alone, as it compacts and hinders root growth. Instead, aim for a balanced mix of 1/3 compost, 1/3 peat moss or coco coir, and 1/3 vermiculite. This blend ensures excellent drainage while retaining necessary moisture for your plants.
The compost provides essential nutrients, the peat moss or coir offers structure and aeration, and the vermiculite keeps the soil light and fluffy. You can also add a slow-release organic fertilizer to give your seedlings an immediate boost.
Mixing these components thoroughly before filling your beds creates a nutrient-dense, friable environment that encourages deep root systems and maximizes yield for vegetables and flowers throughout the growing season.
Using Cardboard and Layering Techniques
Before filling your outdoor raised garden boxes, prepare the base to suppress weeds effectively. Start by laying down thick, overlapping sheets of plain cardboard directly over the grass or soil. Wet the cardboard thoroughly to initiate decomposition and help it settle.
This layer acts as a barrier, preventing grass and weeds from growing up into your fresh soil while eventually breaking down to feed the earthworms.
On top of this, you can employ a lasagna gardening method by alternating layers of brown materials like dried leaves and green materials like grass clippings.
This technique builds soil structure over time and reduces the amount of expensive soil mix you need to purchase initially, ensuring a healthy foundation for your garden.
Calculating Soil Volume and Cost
To determine how much material you need for your outdoor raised garden boxes, calculate the volume in cubic feet. Multiply the bed’s length by its width by its depth in feet. For example, a 4×8 foot bed that is 1 foot deep requires 32 cubic feet of soil mix.
Since soil is often sold in bags measured in cubic feet or by the cubic yard, divide your total cubic footage by 27 to convert to cubic yards if buying in bulk. This step is crucial for budgeting your project accurately.
Remember to account for settling; soil volume will decrease by about 20% over time. Buying high-quality components in bulk, like a yard of compost mixed with a yard of vermiculite, is often more cost-effective than purchasing individual bags for larger beds.
Avoiding Common Soil Mistakes
A frequent error when filling outdoor raised garden boxes is using heavy topsoil or garden soil straight from the ground, which leads to compaction and poor drainage. These dense soils suffocate roots and create an anaerobic environment that stunts plant growth.
Additionally, avoid filling your beds with only compost, as this is too rich and can burn tender plants or cause excessive nutrient runoff. It is also vital to avoid treated lumber scraps or toxic debris in your soil mix.
Another mistake is not lining the bed sides properly if using wire mesh, which can lead to soil loss through the gaps. Always use a specific raised bed mix designed for container gardening to ensure the right texture and nutrient balance for long-term success.
Planting Techniques for Maximum Yield
High-Yield Vegetables for Raised Beds
To maximize space in outdoor raised garden boxes, focus on crops that produce abundantly per square foot. Leafy greens like spinach, kale, and lettuce are excellent choices because you can harvest them multiple times by cutting the outer leaves.
Root vegetables such as carrots and radishes grow well in the deep, loose soil of raised beds. For the highest caloric return, plant determinate tomatoes and bush beans. These varieties are bred to stay compact while producing heavy harvests. Choose indeterminate varieties only if you have adequate vertical support.
Additionally, consider planting fast-growing crops like radishes between slower-growing vegetables to utilize every inch of soil efficiently. This succession planting ensures a continuous supply of fresh produce throughout the growing season without wasting valuable garden space.
Square Foot Gardening Principles
Square foot gardening is an ideal method for outdoor raised garden boxes, allowing you to organize your space into one-foot grids. This technique eliminates wasted pathways and focuses on high-density planting. Plant a different crop in each square foot to maximize variety and yield.
For large plants like tomatoes or peppers, use one square per plant. Medium plants like bush beans can fit four per square, while small crops like carrots or radishes can be sown sixteen per square.
By spacing plants based on their mature size rather than traditional row spacing, you create a living mulch that shades the soil, retains moisture, and suppresses weeds naturally. This precise organization makes maintenance easy and significantly boosts your harvest per square foot.
Companion Planting for Pest Control
Utilizing companion planting in your raised beds is a natural way to deter pests and enhance growth without relying on chemicals. Pairing specific plants together can confuse harmful insects or attract beneficial predators like ladybugs. For instance, planting marigolds alongside tomatoes releases a scent that repels nematodes and whiteflies.
Basil is a perfect companion for tomatoes and peppers, improving their flavor while keeping aphids away. Similarly, planting nasturtiums as a trap crop can lure aphids away from your main vegetables.
Avoid planting members of the brassica family, like broccoli and cabbage, near tomatoes as they can stunt each other’s growth. Strategic pairing not only protects your yield but also promotes a biodiverse ecosystem that keeps your garden healthy and productive throughout the season.
Installing Trellises for Vertical Growth
Growing vertically is essential for maximizing yield in outdoor raised garden boxes, especially for vining crops like cucumbers, peas, and pole beans. Installing trellises allows you to grow upwards rather than outwards, effectively doubling your planting area.
Secure trellises on the north side of your beds to prevent shading shorter plants. Use materials like cattle panels, wooden lattice, or nylon netting that can withstand wind and the weight of heavy vines. As plants climb, air circulation improves, which reduces fungal diseases and makes harvesting easier.
Train vines gently onto the supports to ensure they grow in the desired direction. Vertical gardening also keeps fruit off the soil, preventing rot and pest damage, resulting in a cleaner and more abundant harvest from your raised beds.
Maintenance Tips for Long-Lasting Garden Boxes
Watering Systems and Irrigation Efficiency
To ensure your outdoor raised garden boxes thrive, install a drip irrigation system or soaker hoses. These methods deliver water directly to the plant roots, minimizing evaporation and waste. Mulching around plants helps retain soil moisture and reduces the frequency of watering needed.
It is crucial to check the soil moisture regularly rather than watering on a strict schedule; stick your finger about an inch into the soil to feel if it is dry. Consistent moisture levels prevent plant stress and promote healthy growth.
Additionally, consider installing a timer on your irrigation system to automate the process, ensuring your garden receives water at the optimal time of day, usually early morning, to reduce water loss due to evaporation.
Seasonal Soil Replenishment and Amendments
Maintaining soil health is vital for the longevity of your garden boxes. At the start of every growing season, mix in organic compost to replenish nutrients that were depleted by previous crops. This improves soil structure and water retention.
You should also rotate your crops annually to prevent nutrient imbalances and reduce soil-borne diseases. Adding organic matter like well-rotted manure or leaf mold encourages beneficial microbial activity. Avoid stepping directly into the beds to prevent soil compaction, which can hinder root growth.
Periodically, test the soil pH to ensure it remains optimal for your plants, adjusting it with lime or sulfur if necessary. Healthy soil biology is the foundation of a productive raised bed, ensuring your plants have access to the food they need throughout the season.
Protecting Wood from Rot and Weather
Extending the life of wooden garden boxes requires proactive protection against the elements. Apply a high-quality, non-toxic wood sealant or linseed oil annually to create a moisture barrier. This prevents water from soaking into the wood and causing rot.
Ensure proper drainage by elevating the boxes slightly off the ground using bricks or stone blocks, allowing air to circulate underneath. Avoid using treated lumber that contains harmful chemicals if you are growing edible plants.
Regularly inspect the wood for cracks or signs of decay and repair them promptly to prevent further damage. During winter, cover the boxes or remove soil to reduce moisture retention during freeze-thaw cycles.
Routine maintenance inspections will catch issues early, preserving the structural integrity of your garden investment for many years.
Pest and Weed Management Strategies
Keeping pests and weeds at bay protects your garden’s productivity. Start by applying a landscape fabric or cardboard barrier at the bottom of your boxes before filling them with soil to block weeds from below.
Regularly inspect plants for signs of pests and remove them by hand or use insecticidal soap as needed. Encouraging beneficial insects like ladybugs helps control aphid populations naturally. Mulching not only retains water but also suppresses weed growth by blocking sunlight.
Keep the area around your boxes tidy and free of debris where pests might hide. Installing physical barriers such as row covers can protect vulnerable plants from insects and larger animals.
By staying vigilant and addressing issues immediately, you maintain a healthy growing environment without relying heavily on harsh chemical interventions.
Frequently Asked Questions
What is the best material for outdoor raised garden boxes?
Cedar and redwood are top choices because they are naturally rot-resistant and durable without the need for chemical treatments. Galvanized metal and composite materials are also excellent long-lasting options that offer a modern aesthetic.
How deep should raised garden boxes be for vegetables?
Most vegetables require a depth of at least 6 to 12 inches to allow for healthy root development. Deep-rooted crops like carrots, tomatoes, and potatoes will thrive best in beds that are 12 inches or deeper.
What should I put at the bottom of a raised garden bed?
If placing the bed over grass or soil, you can put down cardboard or landscape fabric to smother weeds and prevent them from growing up. Avoid using plastic sheeting, as it blocks drainage and can suffocate beneficial soil organisms.
What is the best soil mix for filling raised garden boxes?
A recommended mix is often referred to as Mel’s Mix, consisting of 1/3 vermiculite, 1/3 peat moss or coconut coir, and 1/3 blended compost. This combination ensures good drainage, moisture retention, and nutrient availability for your plants.
Do I need to line my raised garden bed with plastic?
You generally should not line the bottom with plastic because it prevents proper drainage and stops earthworms from entering the bed. However, you can line the sides with heavy-duty landscape fabric to keep soil in while allowing air exchange, or use hardware cloth to keep burrowing pests out.
Where is the best place to locate outdoor raised garden boxes?
Select a location that receives at least 6 to 8 hours of direct sunlight daily for most vegetables and flowering plants. Ensure the spot has level ground and easy access to a water source to make maintenance convenient.
Conclusion
They improve soil quality, reduce weeds, and extend the growing season. Start your own raised bed today and experience the joy and rewards of gardening firsthand.